Rotate to Collisions Preferences
Doubleclicking the Rotate To Collision tool in the toolbox (or pressing the Enter key when the tool is selected) will bring up its preferences dialog, which it shares with two other tools in the ColliderScribe plugin.
Some of the preference can be changed on the fly when dragging artwork, by pressing various keys (see Rotate To Collision: Tool Operations).
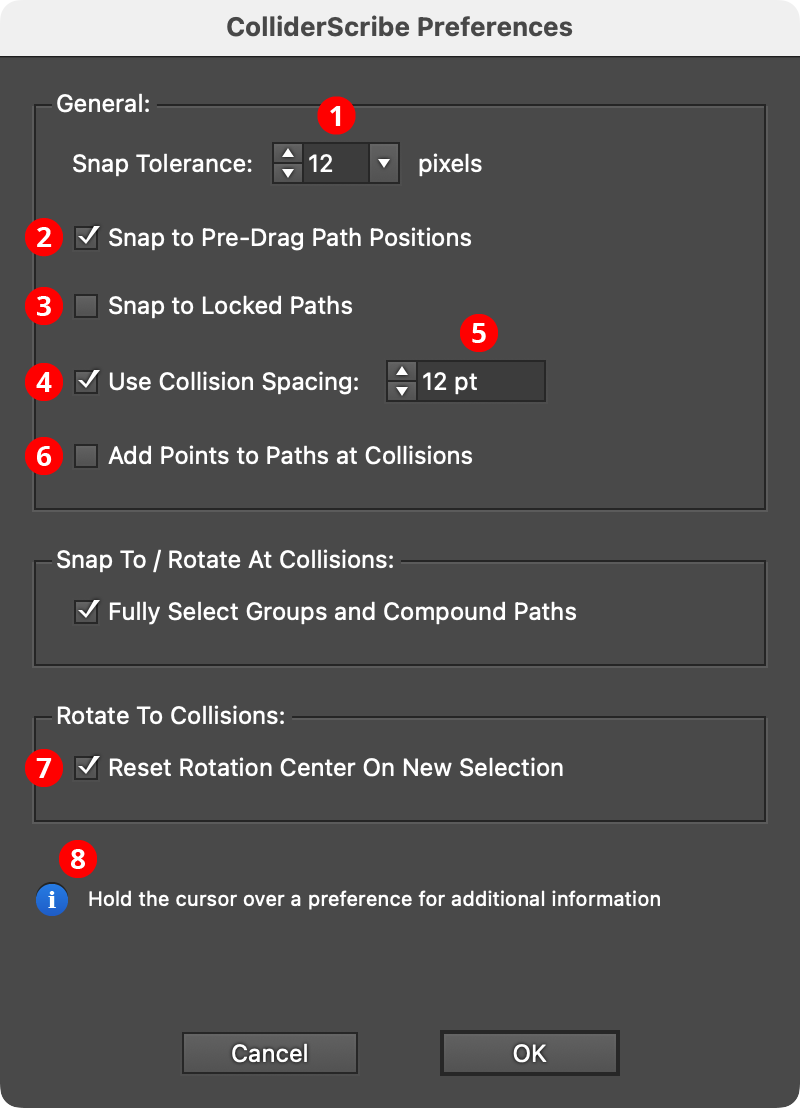
Rotate to Collisions Preferences Dialog
1. Snap Tolerance
Controls the distance from which paths will be snapped to their points of collision, from 2 to 36 px; the default value is 12 px.
2. Snap to Pre-Drag Path Positions
When enabled, rotated paths will snap to themselves in their original position (even if not being duplicated), as long as they have been moved by slightly more than the snap tolerance value. As this can sometimes interfere with positioning the artwork against other art, it can be toggled on the fly using the X key.
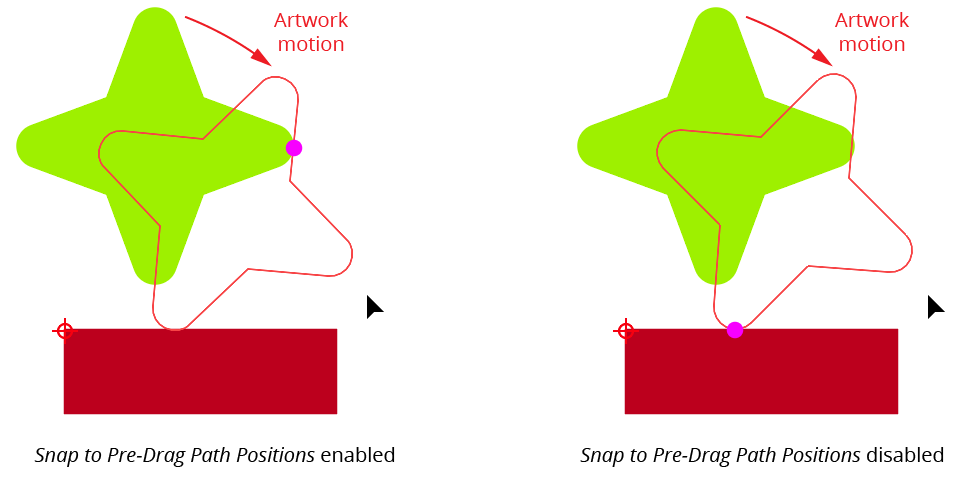
Rotate to Collisions - Self Collision Example
3. Snap to Locked Paths
When enabled, rotated paths will snap to other paths on the artboard that are locked; can be toggled on the fly using the L key.
4. Use Collision Spacing
By default, the Rotate To Collision tool snaps when paths collide with other paths (i.e., first touch them). However, when Use Collision Spacing is enabled, snapping occurs when the paths are a specified distance apart. A purple dot with a line connecting the two paths visualizes the “collisions.”
5. Collision Spacing value
Specifies the distance for collision spacing, from 0.001 pt to 16384 pt; the value can be changed on the fly using the Up/Down Arrow keys. Using a value which is much larger than the snapping distance may make the tool hard to control.
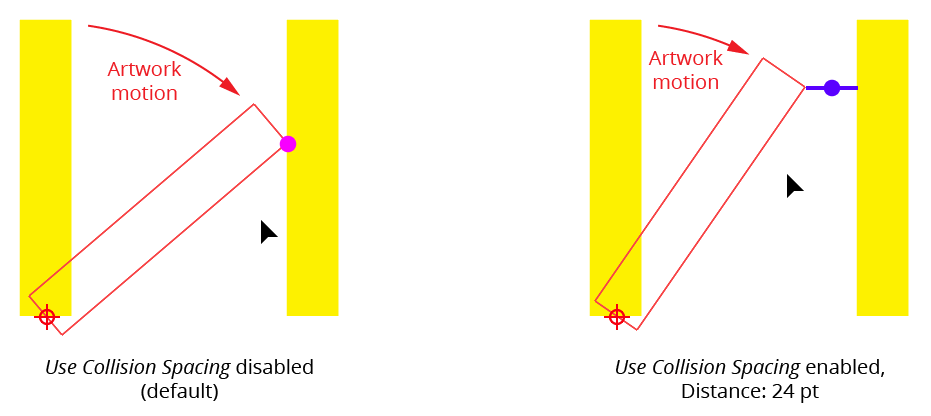
Rotate to Collisions Tool - Spacing Example
Spacing can be useful when one or both objects to be snapped have stroked paths and you want the outside edges of the strokes to touch. In this case simply use a spacing distance that is equal to half the sum of the stroke weights (assuming the strokes are center-aligned).
6. Add Points to Paths at Collisions
When enabled, an anchor point is automatically added, when it does not already exist, to each colliding path at their place(s) of collision. A small dot by the cursor when dragging or duplicating indicates that the preference is active. It can be toggled on the fly with the A key. This preference can be useful for making additional constructions, because Smart Guides does not always reliably detect intersections between paths which touch at a tangent, and, of course, if collision spacing is enabled there won’t be any intersections at all.
7. Reset Rotation Center On New Selection
When enabled, the rotation center point is reset each time the selection changes: it is moved to the center of the selection’s bounding box, similarly to the native Rotation tool. When the preference is off, the rotation center point is never automatically moved, even across multiple uses of the tool.
8. Informational area
Shows a brief description of each preference control when the cursor is being hovered over it.