Autosave
 Autosaviour Overview
Autosaviour Document Settings
Illustrator Location:
Illustrator Main Menu > Window > Astute Graphics > Autosaviour
The menu item to show and hide the Autosaviour panel can be found in the main menu under Window > Astute Graphics > Autosaviour.
Autosaviour Panel
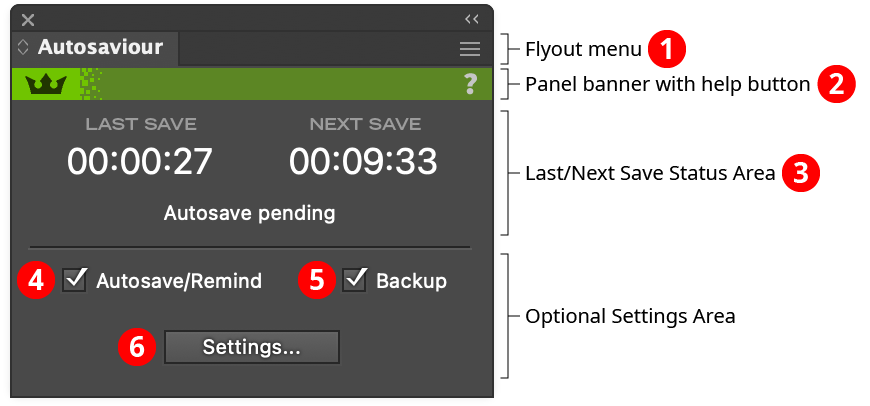
1. Flyout menu
See Autosaviour Panel: Flyout Menu.
2. Panel banner
The help button on the right opens the help documentation in the Astute Manager. If this does not automatically appear, please ensure your Astute Manager is running first.
3. Last/Next Save Status Area
When a document is open which has autosaving or reminding enabled, the timers show the length of time since the last save, and the length of time until the next autosave/reminder is due. If a save operation is overdue (for example, because Autosaviour is set to remind and the reminder has been dismissed but a manual save not made), then the “Last Save” time will be displayed in red. The status line underneath indicates if an autosave or reminder is pending; if the document is unmodified since the previous save or has no settings; or if autosaving is disabled.
4. Autosave/Remind
Allows you to instantly turn autosaving/reminding off and on for the current document. This checkbox may be hidden (along with the Settings... button) by using the flyout menu item Compact Panel.
5. Backup
Allows you to instantly turn file backups off and on for the current document. This checkbox may be hidden (along with the Settings... button) by using the flyout menu item Compact Panel.
6. Settings button
Opens the full settings dialog for the current document (see Autosaviour Document Settings), or, if no document is open, the settings dialog that controls which settings to use for new documents (see Autosaviour: New Document Settings). This button may be hidden (along with the settings checkboxes) by using the flyout menu item Compact Panel. When hidden, the settings dialogs can still be accessed by using the main menu item File > Autosaviour Settings...
Illustrator Location:
Illustrator Main Menu > File > Autosaviour Settings...
The dialog appears when a document is open and the Settings... button on the panel is clicked, or the menu item File > Autosaviour Settings... is chosen, or when the New Document Setting Ask For Settings is enabled and a new document is created. It controls the Autosaviour settings for the current document only.
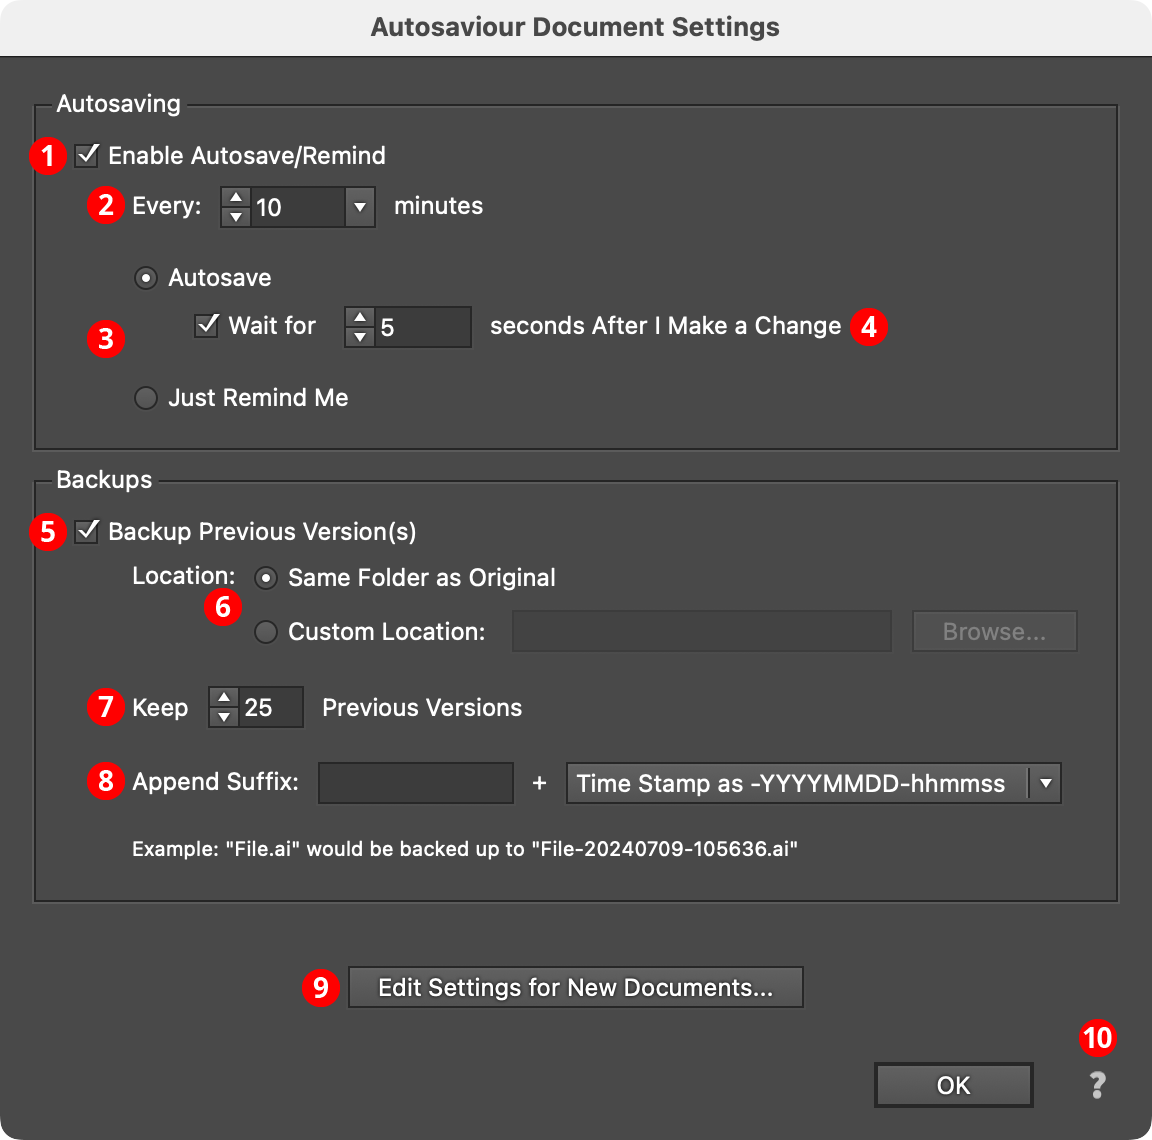
Autosaviour Document Settings Dialog
1. Enable Autosave/Remind
When enabled, autosaving or reminding will occur. This setting can be enabled or disabled directly from the panel without having to open the dialog if the expanded panel is used.
2. Time Interval
Specifies how long that Autosaviour should wait after the document becomes modified before autosaving or reminding takes place. The default value is 10 minutes, but can be changed from 0.25 minutes (i.e., 15 seconds) to 180 minutes (3 hours).
3. Autosave/Just Remind
Chooses between actually autosaving the document when the specified time interval has passed, or just showing a small dialog reminding you to manually save.
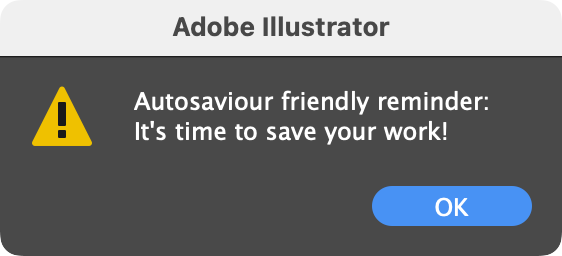
Autosaviour Reminder Dialog
4. Wait for ___ seconds
Because autosaving while in the middle of actively editing your document results in a small delay which might interrupt your “flow,” this setting will make Autosaviour wait for the specified number of seconds after any change to the document before running a pending autosave.
5. Backup Previous Version(s)
When enabled, Autosaviour will keep one or more previous versions of a document in addition to the latest version, utilizing the additional settings below the checkbox.
6. Location
Backups of a document may be stored either in the same folder as the original document, or in a custom location. To set a custom location, either enter the path manually in the text box (for example, “/Users/UserName/Documents/Backups” for Mac, or “D:\Documents\Backups” for Windows) or click the Browse... button, which will bring up a standard OS dialog allowing you to choose a specific folder; the path to that folder will subsequently be entered in the text box.
Autosaviour supports relative paths for the custom location, using standard “.” and “..” notation. For example, to store backups in a folder called “ASBackups” located in the same folder as the document, enter “./ASBackups” as the path. Note that the folder will not be automatically created.
7. Keep count
Specifies the number of backups you want kept, from 1 to 999. If making a new backup would cause this count to be exceeded, then the oldest backup file will be deleted.
8. Append Suffix
Specifies the suffix to add to the document’s name to produce the name of each backup file. An optional string may be entered, followed by either a sequential number or a time stamp in one of six formats. Text underneath will display an example, using a file named “File.ai” and the current date.
For example, with the location set to Same Folder as Original and the suffix set to the default Sequential Numbering, a file called “MyFile.ai” saved three times after backups have been enabled would result in the following files in its folder:

Autosaviour Example File List
In the case of Sequential Numbering, the most recent backup always has the “-001” suffix, while the next-most-recent has suffix “-002”, and so on. Thus, if another change were made to the document and the document saved, the file’s folder would now look like this:

Autosaviour Example File List
Note that each backup file has been renumbered to maintain the aforementioned rule, i.e. “MyFile-003.ai” has become “MyFile-004.ai”, “MyFile-002.ai” has become “MyFile-003.ai”, and so on. For this reason, you may want to use a Time Stamp suffix, which produces an absolute name which will not change.
9. Edit Settings for New Documents... button
Open the New Document Settings dialog (see Autosaviour: New Document Settings).
10. Help Button
Opens the help documentation in the Astute Manager. If this does not automatically appear, please ensure your Astute Manager is running first.
Illustrator Location:
Illustrator Main Menu > File > Autosaviour Settings...
The dialog appears when no documents are open and the Settings... button on the panel is clicked, or the menu item File > Autosaviour Settings... is chosen, or when the Edit Settings for New Documents... button on the Document Settings dialog is clicked. It controls what Autosaviour does when a new document (or a document that it has not previously encountered) is opened.
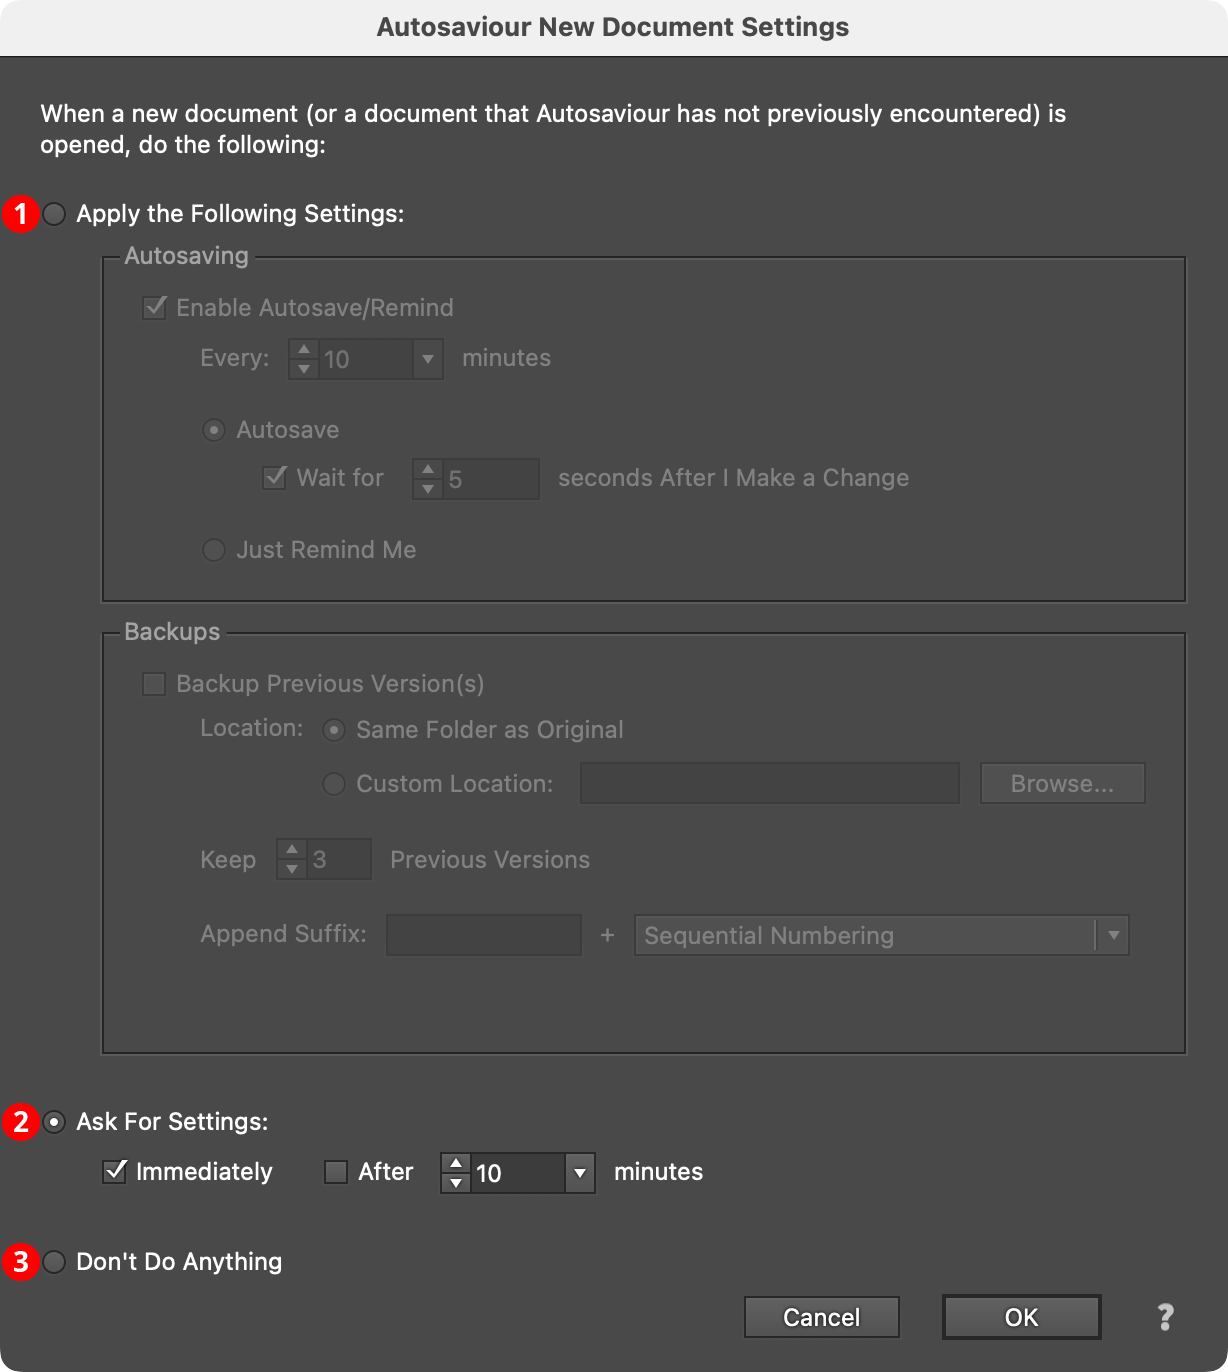
Autosaviour New Document Settings Dialog
The three options for new documents are:
1. Immediately Apply Settings
This option automatically applies the settings in the top section to the document (the available settings are identical to those found on the regular Document Settings dialog).
2. Ask For Settings
This option automatically brings up the Document Settings dialog, either immediately or after the specified time period has passed.
3. Don’t Do Anything
This option keeps the document as is, without any settings. To use Autosaviour with the document, the settings must be applied manually, either by clicking the Settings... button at the bottom of the panel, or choosing the menu item File > Autosaviour Settings...