Space Fill
 Space Fill
Illustrator Location:
Illustrator Main Menu > Window > Astute Graphics > Space Fill
Menu items to show and hide the Space Fill panel can be found in the main menu under Window > Astute Graphics > Space Fill. If the Space Fill object is created using the Object > Space Fill > Make menu item, the panel will be automatically shown if it is not already.
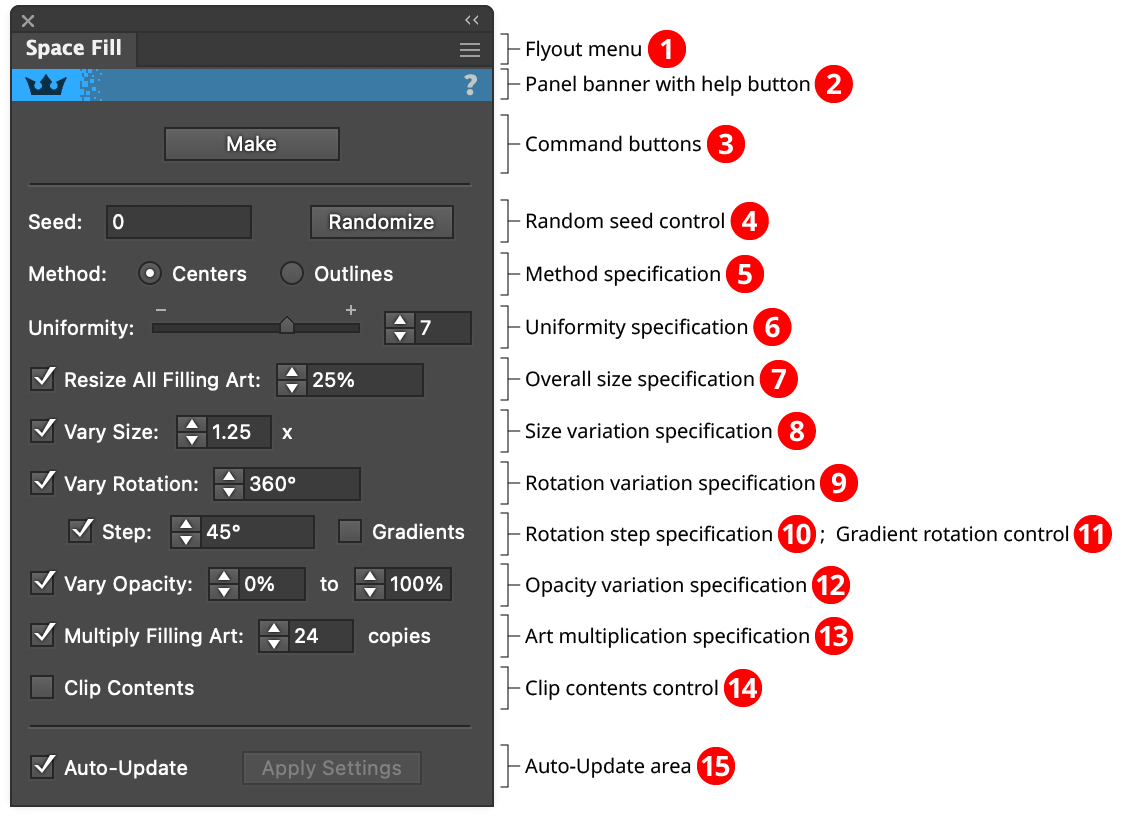
Space Fill Panel Overview
1. Flyout menu
See Space Fill Panel: Flyout Menu.
2. Panel banner
The help button on the right opens the help documentation in the Astute Manager. If this does not automatically appear, please ensure your Astute Manager is running first.
3. Command Buttons
When the selection consists of artwork that is eligible to be turned into a Space Fill (at least one path and one additional art object), the Make button will be available. Clicking Make creates a Space Fill object from the selected artwork using the parameters that are currently specified on the lower area of the panel. If the Auto Detect Container Object preference is not on, the path that should act as the container (i.e., will be filled with the other objects) must be on the bottom of the stacking order of the selected artwork.

Space Fill Make Example
If an existing Space Fill object is selected, the Make button will be hidden, and the Release and Expand buttons will be instead be available:
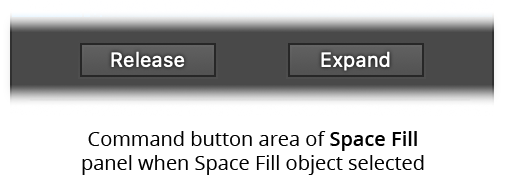
Space Fill Panel Release Expand Area
Clicking Release restores the Space Fill object to its original component objects, which may then be edited and, if desired, the Space Fill made again.
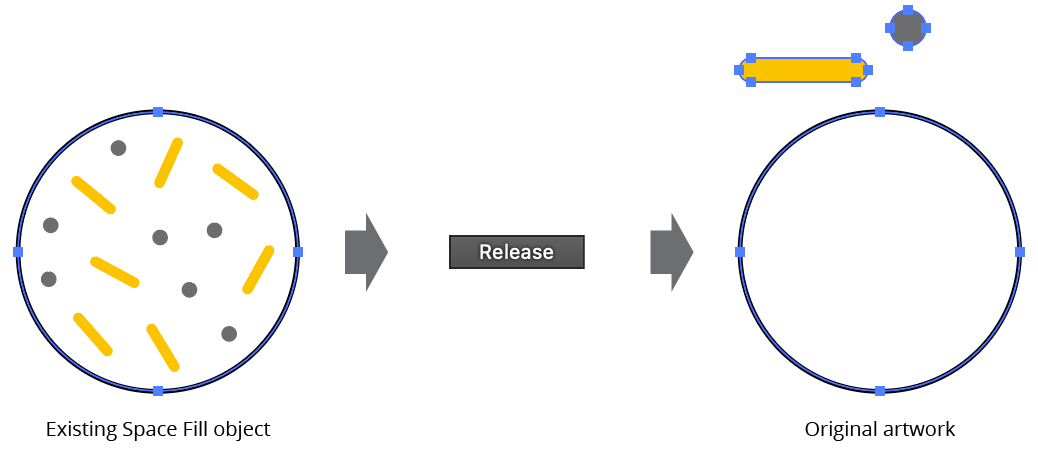
Space Fill Release Example
Clicking Expand “flattens” and removes the live Space Fill object; the filling objects can subsequently be independently edited like any other art objects. Expanded Space Fills are placed into a single group.
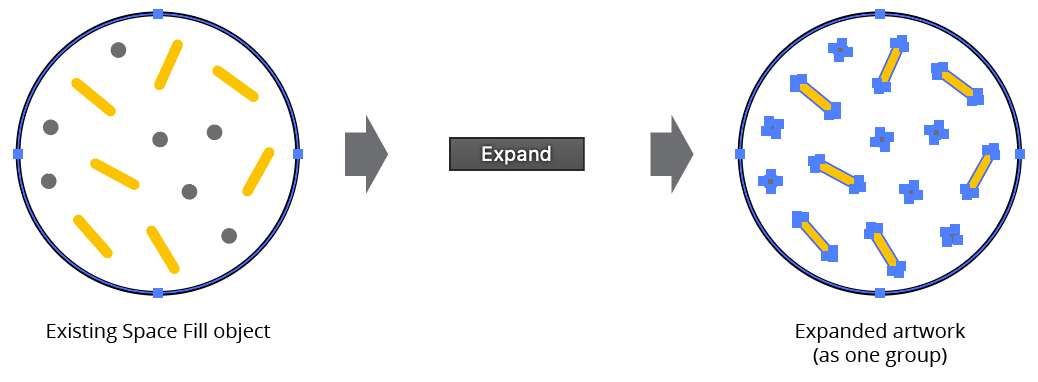
Space Fill Expand Example
Space Fill objects can also be made, released, and expanded through the main menu, under the Object > Space Fill submenu.
4. Random Seed Control
Each random seed number leads to a completely different (but repeatable) sequence of internally-used random values, which results in a different configuration of the filling art. As some of these configurations may be more aesthetically pleasing than others, recording their seeds lets you return to these different looks at a later time. The seed can be manually entered, or the Randomize button can be clicked to generate a random seed number.
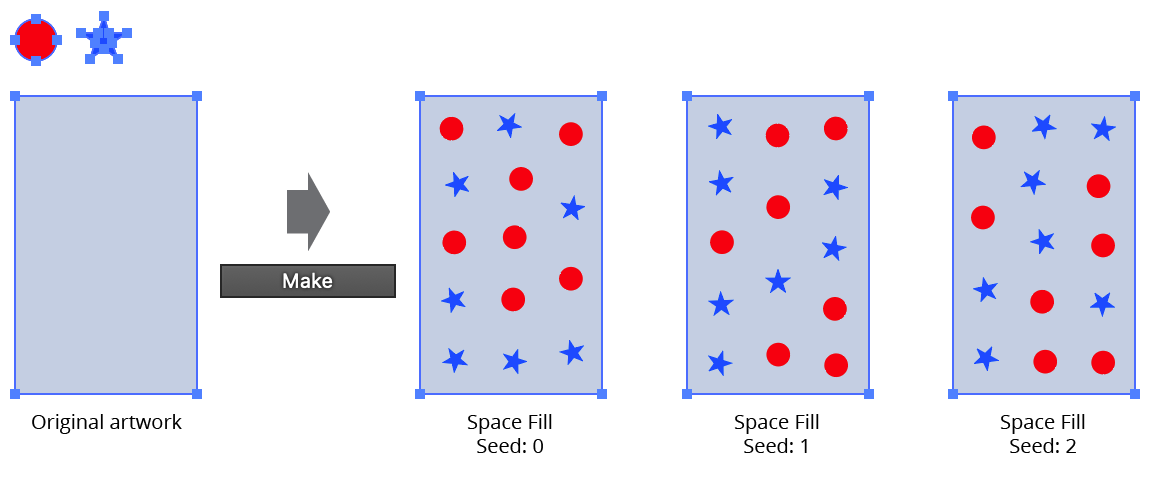
Space Fill Seed Example
5. Method Specification
There are two different methods which may be used to adjust the spacing between the different filling objects. With the Centers method, only the centerpoint of each filling object is considered when determining its position. This makes it fast but generally better to use when all of the filling art is roughly circular in shape and about the same size, otherwise the filling art objects may be more likely to touch each other and/or the edges of the container path as their density increases. With the Outlines method, the actual outlined shape of each piece of filling art is calculated and used to position it:
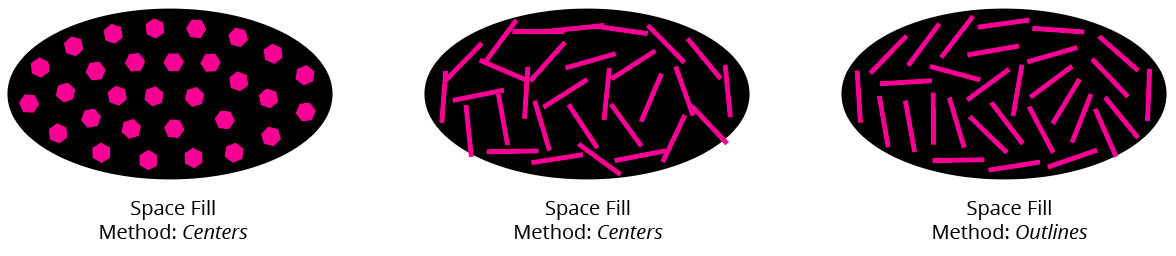
Space Fill Method Example
6. Uniformity Specification
Controls the overall uniformity of the positioning of the filling art, from 1 to 10. Higher values result in more even spacing:
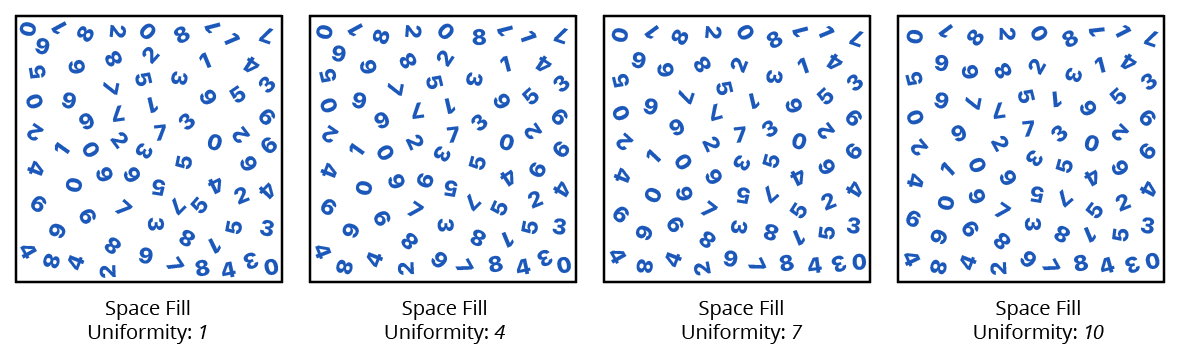
Space Fill Uniformity Example
7. Overall Size Specification
Controls the overall scaling, if any, of all the filling art objects (which may be subsequently modified with the Vary Size setting). Can range from 0.1% to 10000%.
8. Size Variation Specification
Controls the amount, if any, by which each piece of filling art is randomly scaled either up or down (after the overall scale is applied). For example, a Vary Size value of 2.0 means the art would be scaled anywhere from downwards two-fold (i.e., to 50%) to upwards two-fold (to 200%). The maximum Vary Size multiplier is 10x.
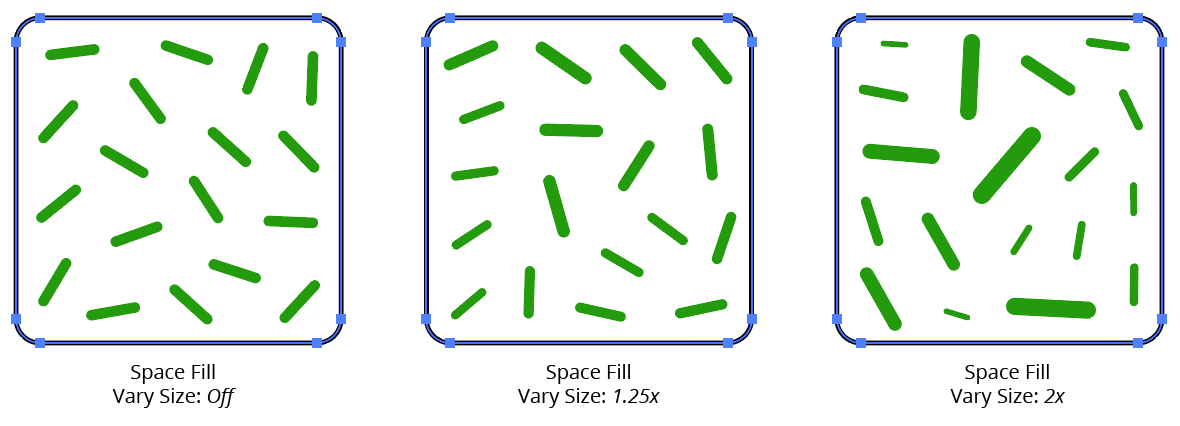
Space Fill Vary Size Example
9. Rotation Variation Specification
Controls the amount by which each piece of filling art is randomly rotated, if at all, in either the clockwise or counter-clockwise direction. A value of 12°, for example, means each piece of art may be rotated anywhere from -12° to +12°.

Space Fill Vary Rotation Example
10. Rotation Step Specification
Available when Rotation Variation is enabled, it limits the rotation variation values to multiples of the specified step value. For example, if the Step is set to 45°, then all random values will be rounded to the nearest value which is a multiple of 45°.
11. Gradient Rotation Control
Available when Vary Rotation is enabled; when the checkbox is disabled, gradients in the filling art are not rotated with the art.
12. Opacity Variation Specification
When enabled, allows a minimum and maximum opacity value to be specified; each piece of filling art will have its opacity set to a value randomly picked within the interval:
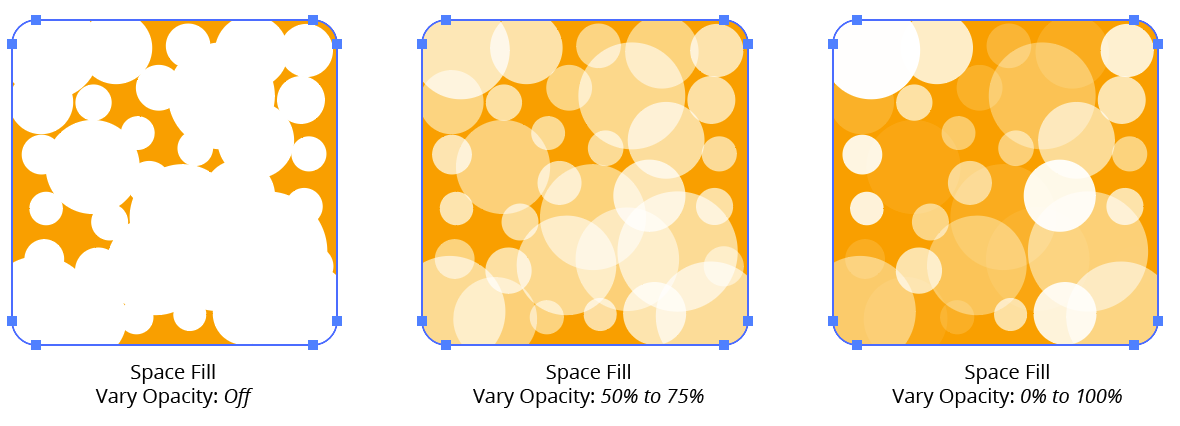
Space Fill Very Opacity Example
13. Art Multiplication Specification
Controls the number of copies of each piece of filling art that will be used to fill the container, from 2 to 9999:
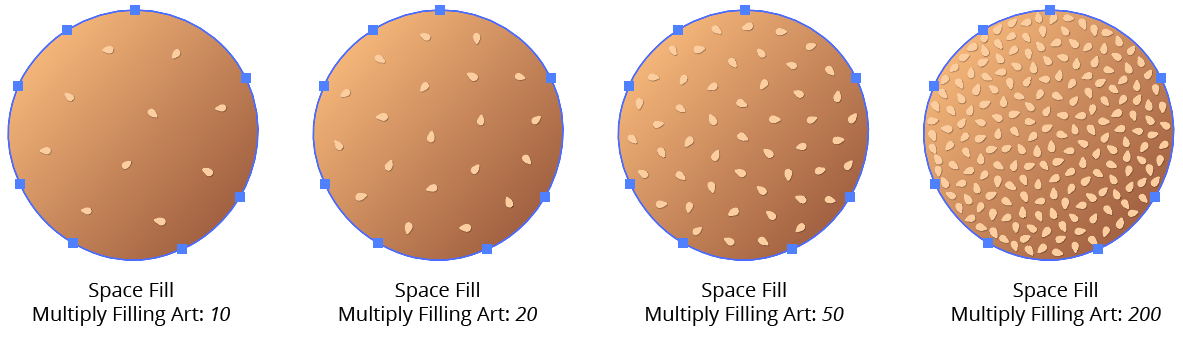
Space Fill Multiply Example
14. Clip Contents
When Clip Contents is enabled, the filling art will be clipped by the container path, preventing it from sticking out beyond its edge.
15. Auto-Update Area
When Auto-Update is enabled, the selected Space Fill object(s) will be updated every time a setting on the panel is changed. When disabled, the Apply Settings button becomes available and must be pressed to update the selected Space Fill object(s) with the current parameter settings.
Note: We recommend when working with lots of elements to disable the auto-update option. Making lots of small incremental changes with auto-update enabled can slow down the live preview on slower machines.