 Circle by Points Tool
Circle By Points is an Astute Graphics tool for Adobe Illustrator that creates circular paths by specifying either two or three points that the circle must pass through. The circle can have its anchor points placed in relation to these clicked points, or in standard positions. Circle By Points is part of the SubScribe plugin.
Tool Location and Cursor Appearance
The Circle by Points tool appears in Illustrator’s main toolbar (which must be in Advanced mode: View > Toolbars > Advanced).
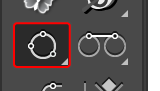
Circle by Points Tool Location
The Circle by Points tool’s cursor is a standard crosshair:

Circle by Points Tool Cursor
Circle by Points Tool Operation
As the Circle by Points tool has several keypresses which can add or change its functionality, we suggest installing the free Astute Graphics plugin Astute Buddy, which creates a panel that dynamically updates to inform you of the various keys which can be pressed in the tool’s current context.
There are several methods of creating circles, depending on the Third Point Must Be Dragged tool preference (see Circle by Points: Preferences).
When the preference is enabled (the default), circles can be created from two points simply by clicking twice (allowing you to scroll, zoom, change the view mode, etc. in the middle of the operation), although they can also be created by clicking-and-dragging. The two points always define the diameter of the circle.
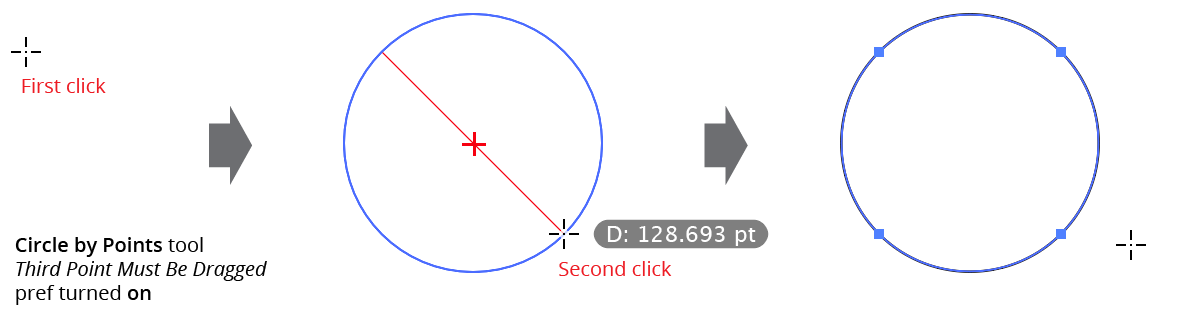
Circle by Points 2 Click Operation
To create a circle from three points, you must not release the mouse button after clicking to create the second point; instead you must start dragging, which positions the third point.
When the preference is disabled, circles can be created from three points by clicking three times. However, to create a circle from two points you must either click-and-drag from the first point, or doubleclick on the second point instead of single click.
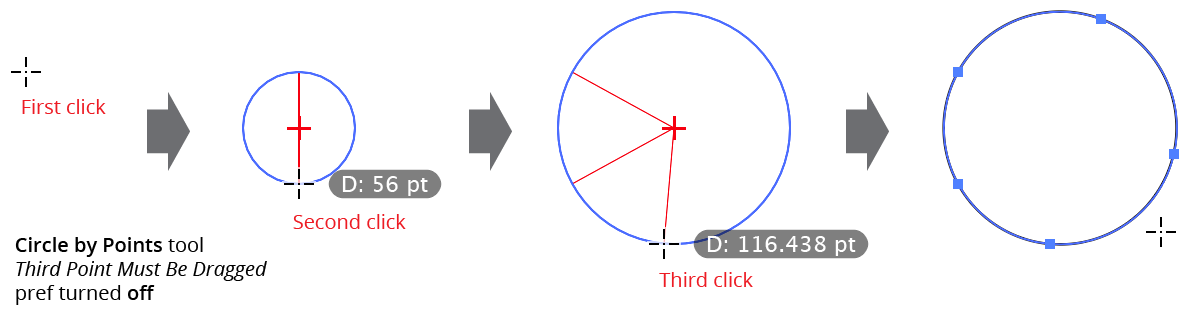
Circle by Points Tool 3 Click Operation
By default, the circle’s center, radii, and diameter value will be displayed while creating the circle, but these can be turned on and off independently through the preferences, as can the color of the annotation lines.
While creating a circle using two points, two modifier keys can be used with the Circle by Points tool:
Shift: Constrains the angle between the first point and the second point to increments of 45° around the constrain angle.
Option/Alt: Constrains the diameter of the circle to “nice” values, dependent on the current zoom level and units. For example, at 200% zoom, the diameter is constrained to multiples of 2 pt or 0.5 mm.
While creating a circle using three points, as the third point approaches the imaginary line formed by the first two points, the resulting circle approaches infinite size. When its size becomes larger than Illustrator could accommodate, the tool will no longer create artwork but will instead display “Circle too large” by the cursor. In this case, the third point must be moved to a different position.
The Circle by Points tool honors Smart Guides.
Circle by Points Preferences
Doubleclicking the Circle by Points tool in the toolbox (or pressing the Enter key when the tool is selected) will bring up its preferences dialog:

Circle by Points Preferences
1. Circle Center
When enabled, the circle’s centerpoint is drawn with a small cross while the circle is being created.
2. Circle Radii Lines
When enabled, lines showing the radii of the circle (from the center to the two or three points lying along its circumference) are drawn while the circle is being created.
3. Diameter Value
When enabled, the current diameter of the circle is displayed next to the cursor.
4. Color
Allows a choice of colors in which to annotate the circle’s center and/or radii lines, from among red, blue, magenta, green, black, and grey.
5. Always Place Anchor Points in Standard Positions
When enabled, the final circular path will always have four anchors points at the standard positions (0°, 90°, 180°, and 270°, taking into account the general constrain angle). Otherwise, anchor points will be created at the points used to set the circle, plus any additional ones needed to keep the shape accurate.
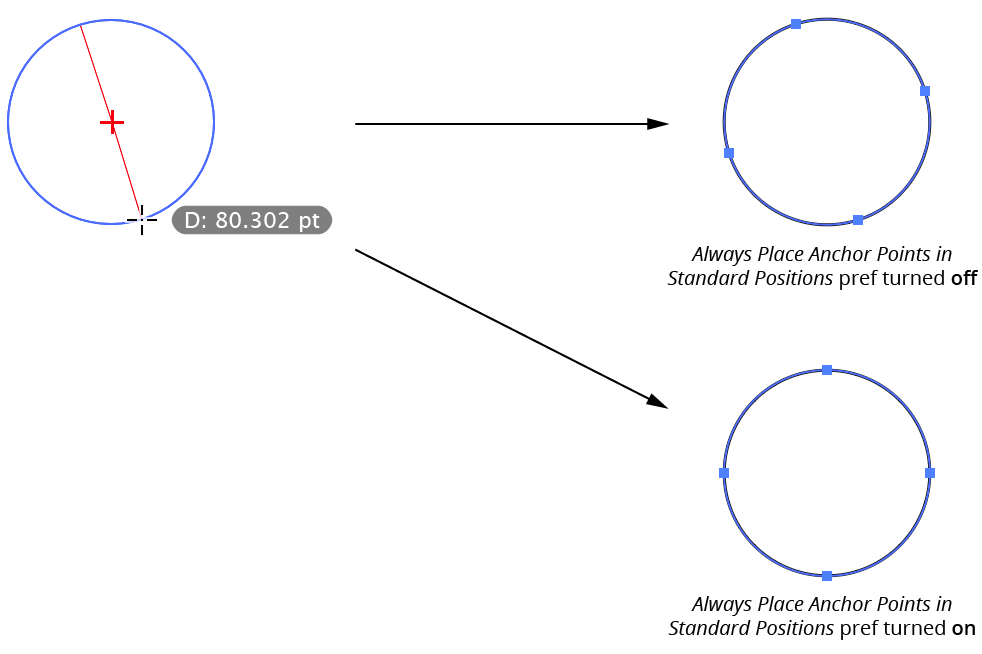
Circle by Points Standard Point Placement
6. Third Point Must Be Dragged
When enabled, clicking twice will immediately create a circle from two points after the mouse button is released. To create a circle from three points, you must drag after the second click to create the third point. When not enabled, you can create a circle from three points by clicking three times; a two-point circle may be created by either clicking-and-dragging to create the two points, or by doubleclicking the second point.
7. Make Circles Dynamic When Possible
This preference will be available only if the Astute Graphics VectorScribe plugin is installed. When enabled, the circles will automatically be created as Dynamic Circles when possible (circles with non-standard anchor point positions are not eligible).
8. Informational area
Shows a brief description of each preference control when the cursor is being hovered over it.
9. Help Button
Opens the help documentation in the Astute Manager. If this does not automatically appear, please ensure your Astute Manager is running first.