- Getting Started
- Training
- Features
- Effects
-
Plugins
- AG Core
- AstuteBuddy
- Autosaviour
- ColliderScribe
- DirectPrefs
- DynamicSketch
- FindReplace
- InkFlow
- InkQuest
- InkScribe
- MirrorMe
- Phantasm
- Randomino
- Rasterino
- Reform
- Stipplism
- Stylism
-
SubScribe
- Getting Started
- Circle by Points Tool
- Tangent Circle Tool
- Curvature Circle Tool
- Arc by Points Tool
- Tangent Line Tool
- Perpendicular Line Tool
- Connect Tool
- Straighten Tool
- Lock Unlock Tool
- Orient Tool
- Quick Orient Tool
- Orient Transform Tool
- AG Layer Comps Panel
- Art Switcher Panel
- Gradiator Panel
- Gradient Forge Panel
- AG Color Select Tool
- Color Stamp
- Gradient From Art
- Pixels to Vector
- QuickOps
- Texturino
- VectorFirstAid
- VectorScribe
- WidthScribe
- FAQs
- Team Licensing
- Reseller Licensing
- Astute Manager
The Quick Orient tool can be used in two ways: by simply clicking on art objects, or by drag-marqueeing over them. The artwork does not need to be selected. In either case, the default method for determining how much to rotate an object to “straighten” it is by looking at the rotation of the bounding box that Illustrator stores for each piece of art.

Quick Orient Tool Example
Therefore, if the art’s bounding box becomes reset (for example, by choosing Object > Transform > Reset Bounding Box), Quick Orient will not be able to automatically straighten the object except for certain types of art such as raster images, which keep rotation data in an additional location.

Quick Orient Rotated Bounding Box Example
However, for paths, Quick Orient can also use a path segment to rotate the path. To do this, hover the tool over a path segment and press the Option/Alt key. The path will be rotated such that the segment’s endpoints are horizontal (taking into account the general constrain angle), with the imaginary point halfway between the two endpoints acting as the center of rotation.

Quick Orient to Segment Example
Because the tool’s automatic orientation may not necessarily be the desired one, after clicking (and with the mouse button still down), the Space bar may be pressed to rotate the art repeatedly in 45° steps.

Quick Orient - Reorient Example
By default the Quick Orient tool acts on members of groups independently, but by holding Shift, all members of the top-most group to which the art under the cursor belongs (if any) will be rotated together.

Quick Orient Whole Group Together
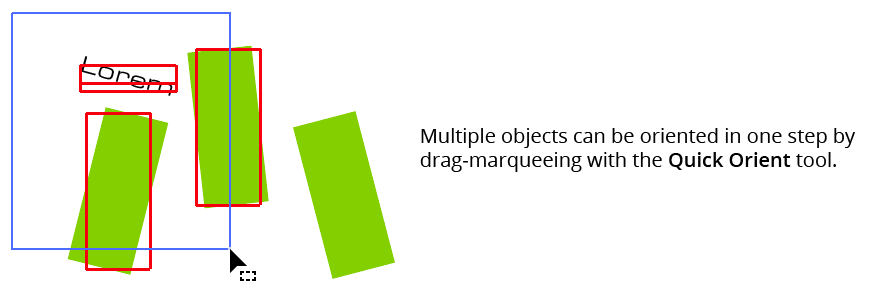
To orient multiple art objects in one step, drag a marquee over them:

Quick Orient Marqueeing Example
The Quick Orient tool has no preferences. The color of the annotation used to preview the oriented artwork is taken from the Orient tool’s preference.
