- Getting Started
- Training
- Features
- Effects
-
Plugins
- AG Core
- AstuteBuddy
- Autosaviour
- ColliderScribe
- DirectPrefs
- DynamicSketch
- FindReplace
- InkFlow
- InkQuest
- InkScribe
- MirrorMe
- Phantasm
- Randomino
- Rasterino
- Reform
- Stipplism
- Stylism
-
SubScribe
- Getting Started
- Circle by Points Tool
- Tangent Circle Tool
- Curvature Circle Tool
- Arc by Points Tool
- Tangent Line Tool
- Perpendicular Line Tool
- Connect Tool
- Straighten Tool
- Lock Unlock Tool
- Orient Tool
- Quick Orient Tool
- Orient Transform Tool
- AG Layer Comps Panel
- Art Switcher Panel
- Gradiator Panel
- Gradient Forge Panel
- AG Color Select Tool
- Color Stamp
- Gradient From Art
- Pixels to Vector
- QuickOps
- Texturino
- VectorFirstAid
- VectorScribe
- WidthScribe
- FAQs
- Updates
- Team Licensing
- Reseller Licensing
- Astute Manager
4. Inviting End Users to become Team Members in their Team
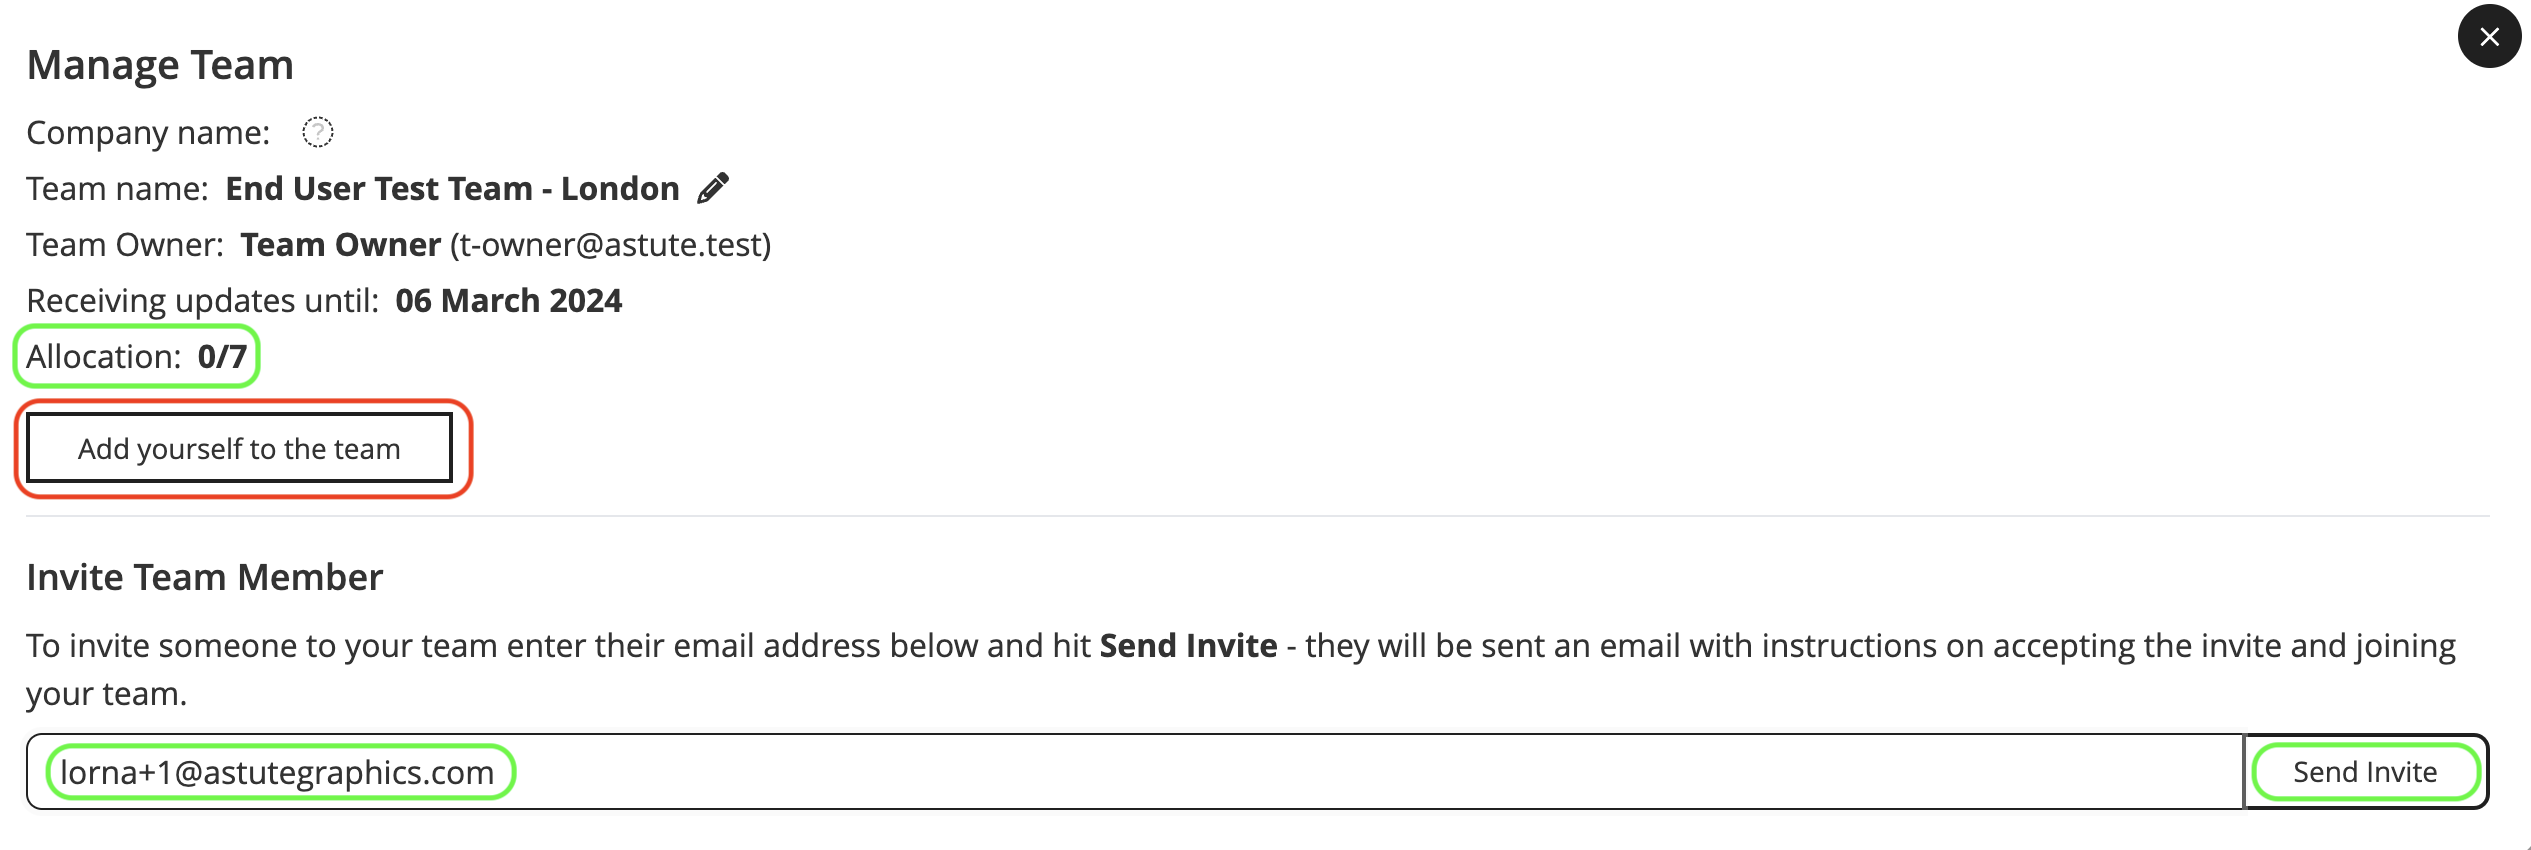
To get started with sending invites, you should go to the Teams page and select Manage, there you will see the following options:
Add yourself to the team in your case this option is to be ignored. Clicking this will add you as a Team Member and issue one of the licenses to you, but as a reseller you do not want to do this.
The Send Invite option allows you to invite a Team Member by entering their email address. To send an invite, click in the Email address field, enter the email address of the invitee and click Send Invite.
You will notice that because none of the licenses have been allocated yet, the license allocation is showing as 0.
The person you invite should be the person who will be Managing the team. You should first invite them as a Team Member > then (when they accept) promote them to Team Manager. Please scroll down to PROMOTING A TEAM MEMBER TO TEAM MANAGER for full guidance on this.
Add yourself invite
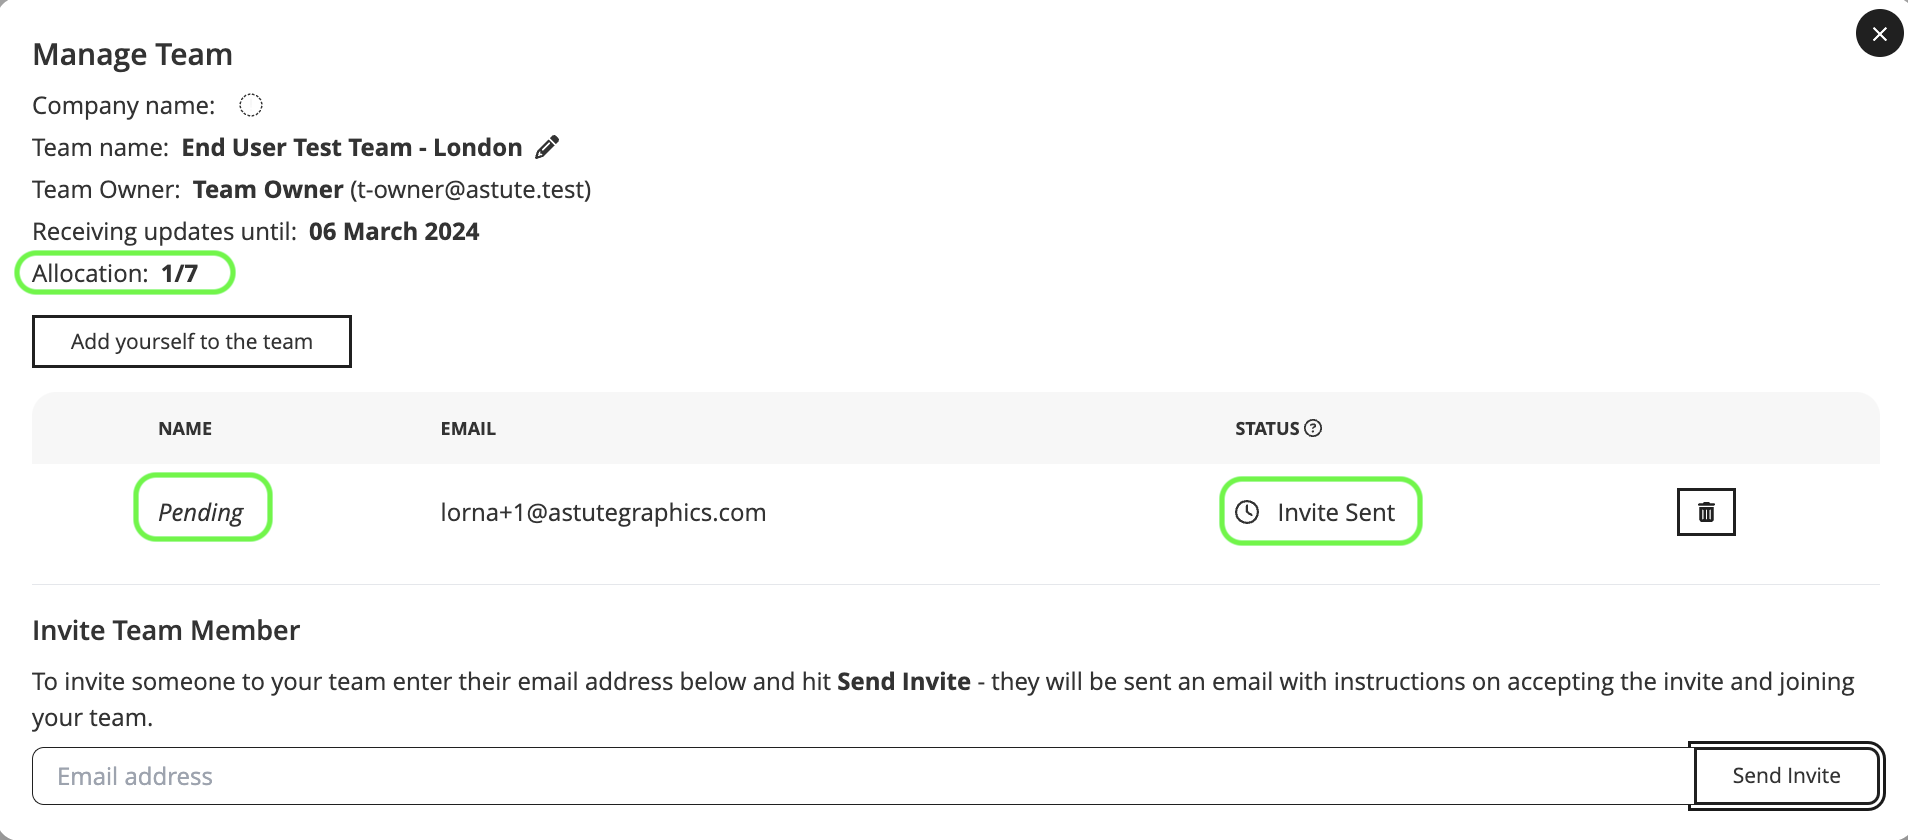
When you enter the email address and click Send Invite, an account is now created for the invitee (unless they have already created one through a Free Trial), and you will see notification that the invitee has been sent an invite email.

Invite sent confirmation
In the example below, 7 licenses have been purchased and the Reseller Team Owner has sent 1 invite. The invite has yet to be accepted and the status is showing as Pending.
You can see that because 1 of these licenses has now been allocated, the license allocation is 1/7.
1 of 7 invites pending
Once the End User/invitee has accepted their invite, the status will change to indicate that the invitee is now a Team Member.

Invites sent and accepted
You now need to Promote that Team Member to a Team Manager so that they have admin permissions on their team. Please scroll down to PROMOTING A TEAM MEMBER TO TEAM MANAGER for full guidance on this.