- Getting Started
- Training
- Features
- Effects
-
Plugins
- AG Core
- AstuteBuddy
- Autosaviour
- ColliderScribe
- DirectPrefs
- DynamicSketch
- FindReplace
- InkFlow
- InkQuest
- InkScribe
- MirrorMe
- Phantasm
- Randomino
- Rasterino
- Reform
- Stipplism
- Stylism
-
SubScribe
- Getting Started
- Circle by Points Tool
- Tangent Circle Tool
- Curvature Circle Tool
- Arc by Points Tool
- Tangent Line Tool
- Perpendicular Line Tool
- Connect Tool
- Straighten Tool
- Lock Unlock Tool
- Orient Tool
- Quick Orient Tool
- Orient Transform Tool
- AG Layer Comps Panel
- Art Switcher Panel
- Gradiator Panel
- Gradient Forge Panel
- AG Color Select Tool
- Color Stamp
- Gradient From Art
- Pixels to Vector
- QuickOps
- Texturino
- VectorFirstAid
- VectorScribe
- WidthScribe
- FAQs
- Updates
- Team Licensing
- Reseller Licensing
- Astute Manager
6. Promoting a Team Member to Team Manager
Now that the invitee/End User has accepted, you must remember to promote them to a Team Manager. When you promote them, the license allocation is then removed and they become a Team Manager, but not a user of the license. It’s strongly recommended that you do this as soon as possible.
Click on Promote and then select Make Team Manager.
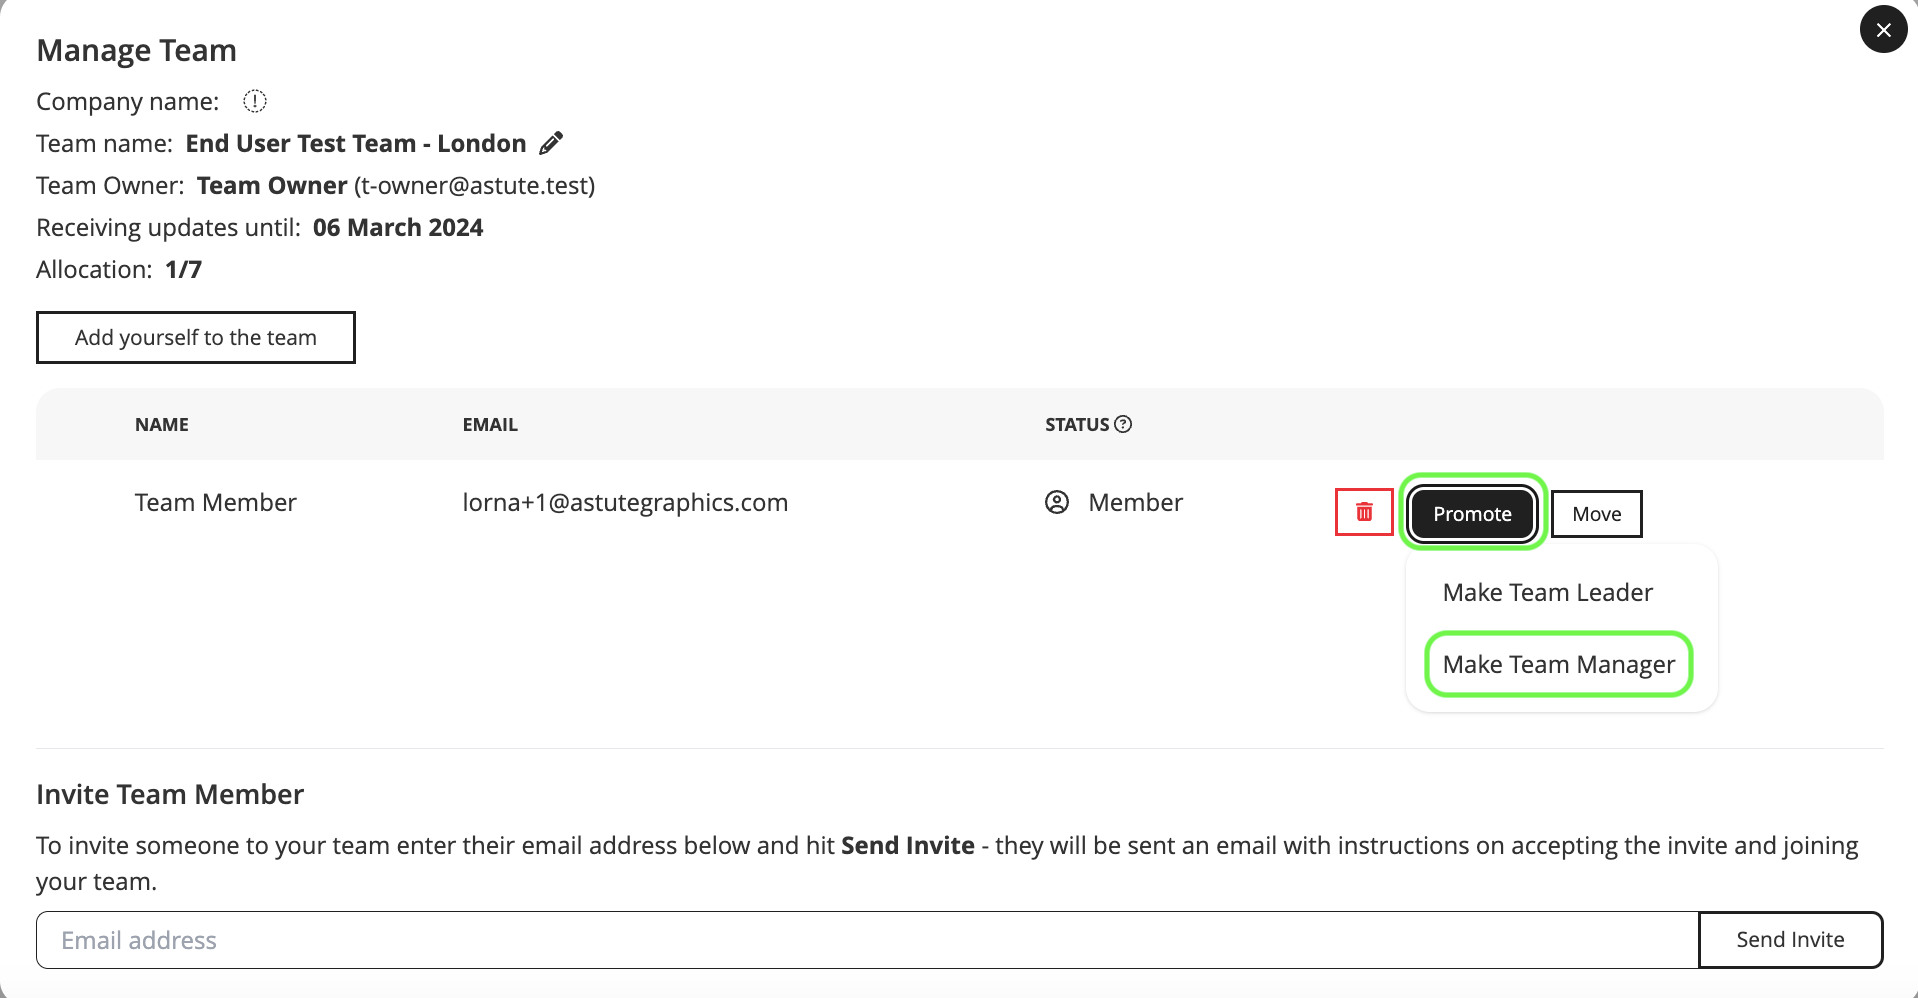
Promote to Team Manager
You’ll be asked if you’re sure you want to promote the user, and after selecting Confirm, you’ll see confirmation that this user now has permission to manage that team.

Team Manager Confirmation
If you have selected an incorrect Team Manager, or if you need to change them. You can do this at any time by clicking on Demote.
Once you have added the Team Manager, you will notice that the number of licenses allocated reduces (in this case from 1/7 to 0/7). This is because a Team Manager doesn’t have access to the use of a license themselves.
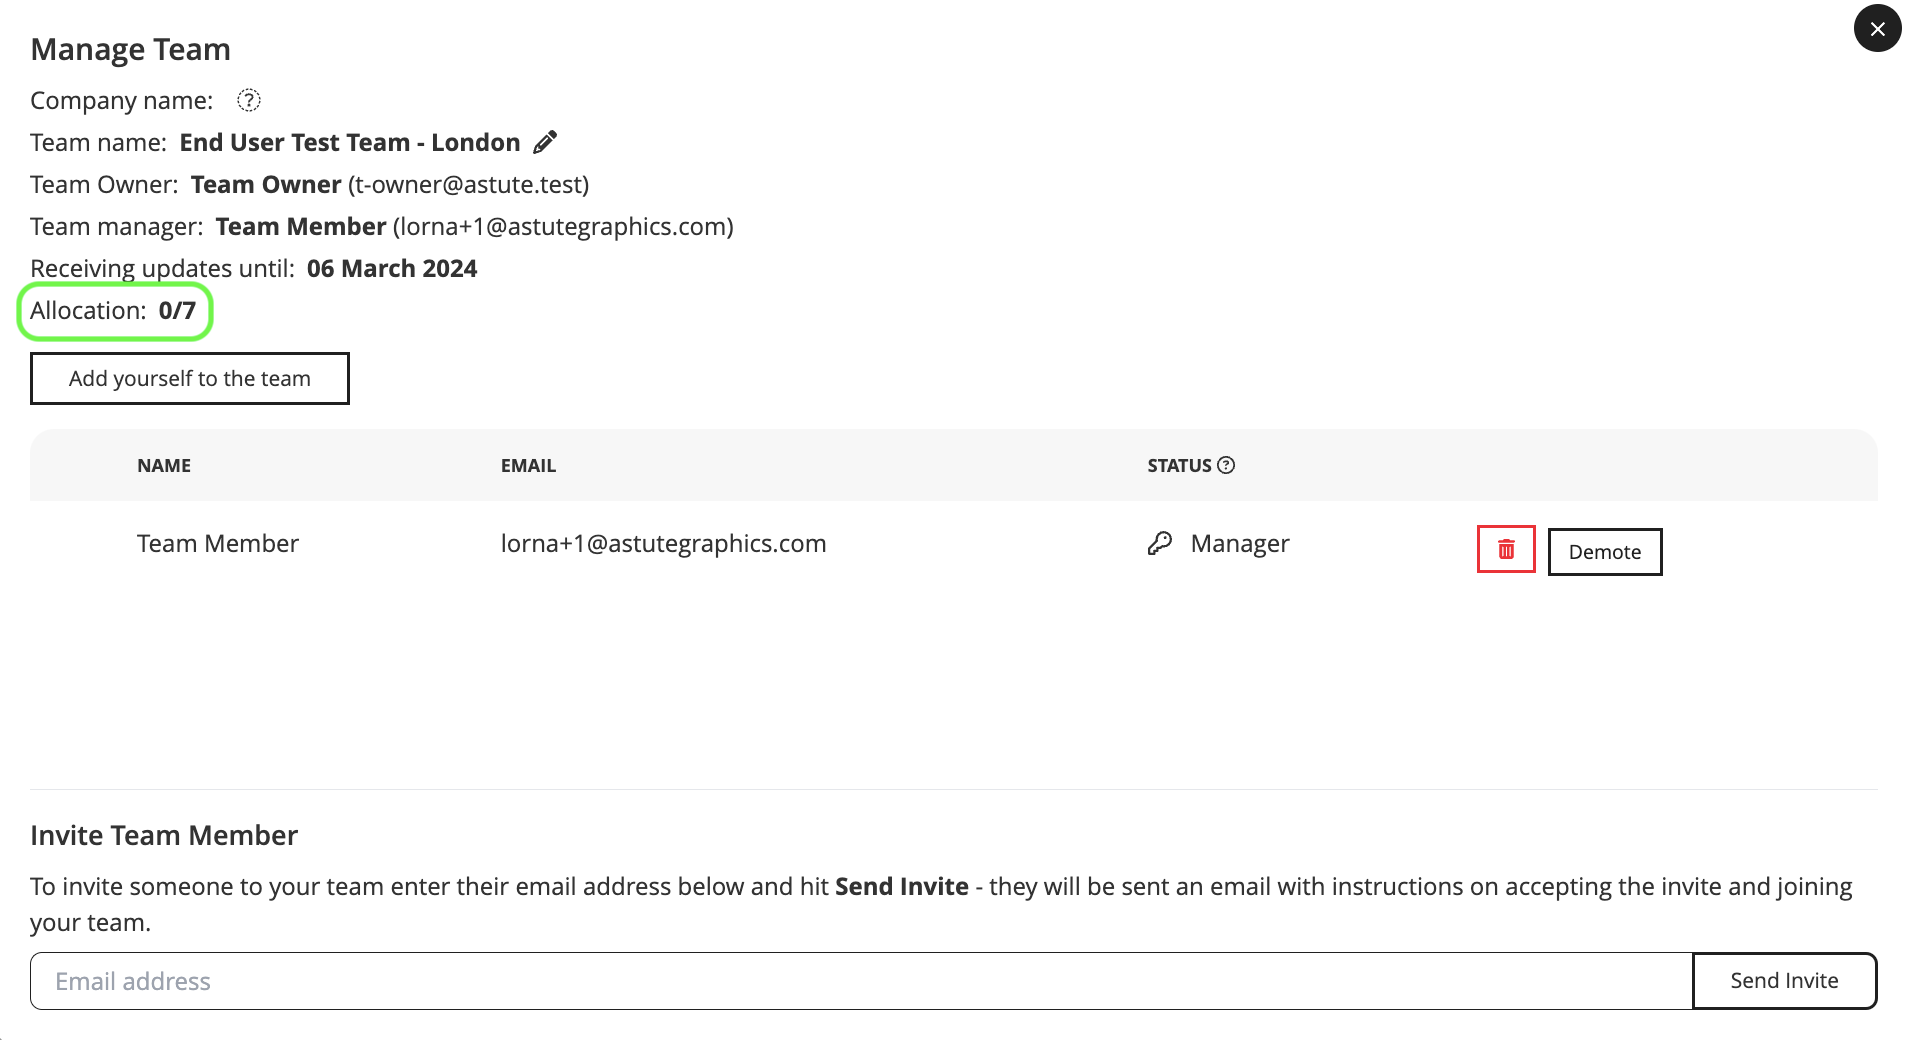
Team Manager accepted allocation decrease
Now the Team Manager is free to send invites to the other members of the team. Once the invitees have accepted, they will show as Members.
Note that in the example shown below, although there are only 7 licenses allocated to 7 Team Members, the team has 8 members. Again, this is because the Team Manager is only an admin and they don’t have access to the use of a license themselves.
If they wish to use a license, they can change their own permissions to Team Leader, they will then have access to use of a license.

All team members allocated