 Width Gradient Tool Operation
As the Width Gradient tool has several keypresses for certain operations, we suggest installing the free Astute Graphics plugin Astute Buddy, which creates a panel that dynamically updates to inform you of the various keys which can be pressed in the tool’s current context.
The Width Gradient tool works in conjunction with the associated Width Gradient panel, which should be open and accessible. If you are using the free Astute Graphics plugin DirectPrefs, you can have the Width Gradient panel automatically be shown when the Width Gradient tool is selected.
Using the Width Gradient tool is similar to using the Gradient tool in Photoshop, except an actual color-to-color gradient is not generated. Instead, all selected paths that fall within the bounds of the virtual gradient are converted to variable width (if they aren’t already), and their width markers are adjusted using values corresponding to each location along the virtual gradient, as specified in the Width Gradient panel. Adjustment may be in either an absolute sense (the widths are changed to specific values) or a relative sense (the widths are changed to a percentage of their original values).
For example, if the panel were set to adjust in an absolute, linear fashion, with start and end widths of 4 pt and 20 pt, then after dragging the tool, spots along the path(s) that were in line with the start of the gradient would get width markers set to 4 pt, while those in line with the end of the gradient would get width markers set to 20 pt. Those in the middle would receive a width of 12 pt (because half of 4 + 20 is 12, and the panel graph is linear).

Width Gradient Basic Example
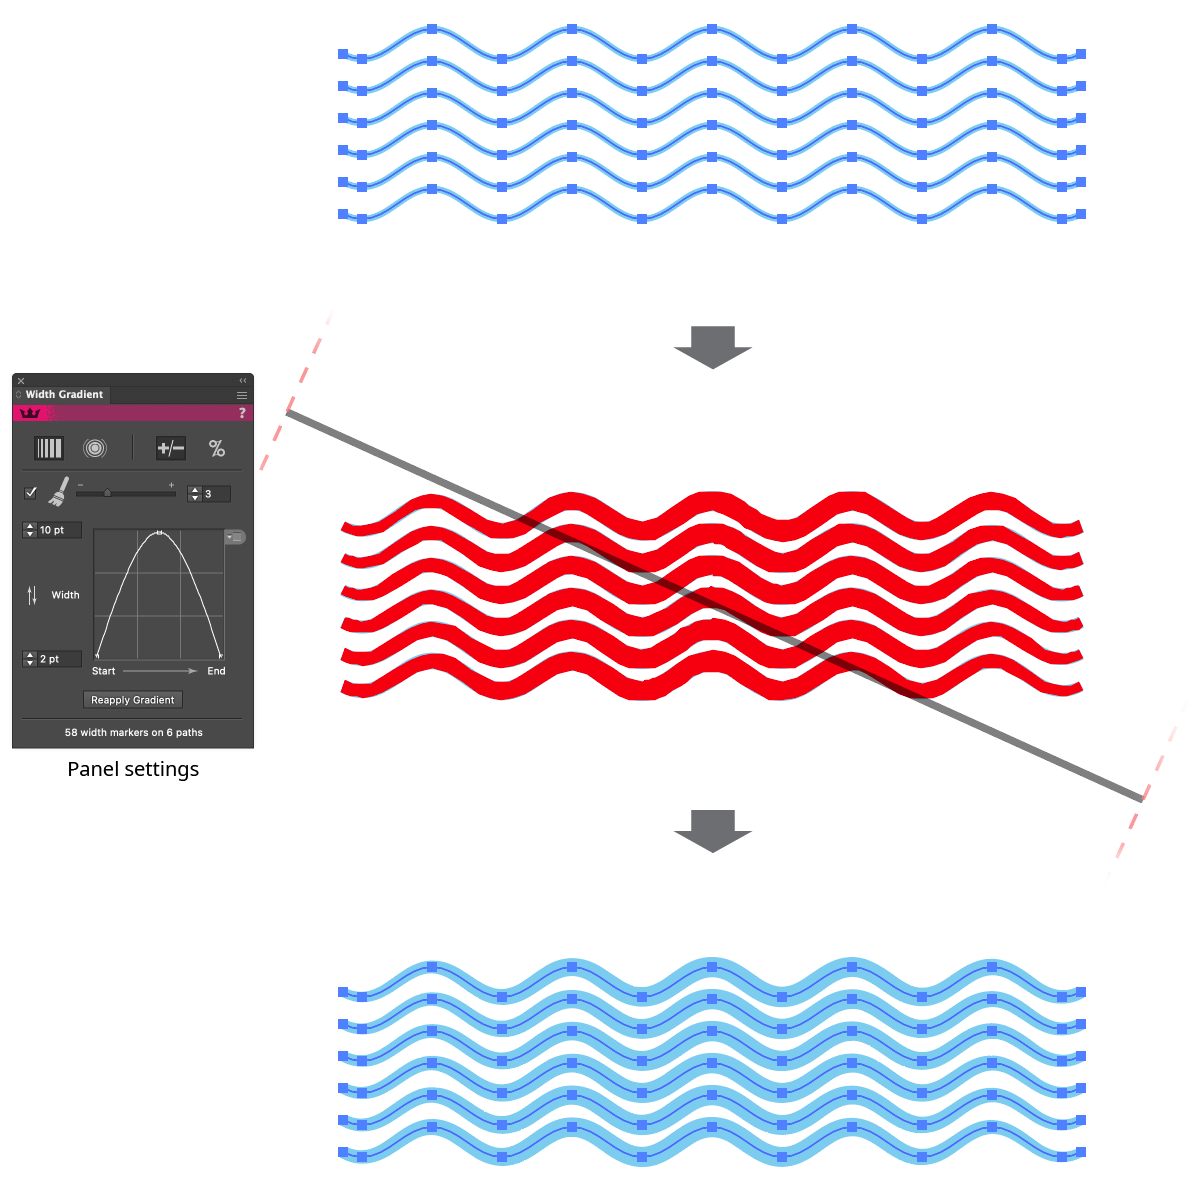
Of course, the line in the previous example could easily have had its widths set manually with the native Width tool, since only a single width marker at each end was necessary. The real power of Width Gradient comes when multiple paths are adjusted, possibly in a non-linear manner:

Width Gradient Example
The tool draws annotations while in use, showing the start and end points of the gradient (represented by a gray, semi-transparent line), and, using semi-transparent dashed lines, either perpendiculars to the gradient (for linear gradients) or a circle at the outer edge of the gradient (for radial gradients).

Width Gradient Tool Annotations
In addition, by default, the new widths of the path(s) are previewed, using a solid, user-specifiable color (red, by default). This preview is only approximate and may not agree exactly with the final paths. In particular, corner joins and end caps are not previewed.
While dragging with the Width Gradient tool, a number of keypresses may be used:
Shift: Constrains the gradient angle to 45° angles around the general constrain angle.
Option/Alt: Toggles between linear and radial mode.
Space: Repositions the entire gradient.
Up Arrow/Down Arrow: Adjusts the bottom width value on the panel (typically assigned to the start of the gradient). For each keypress, the value is changed by 1 pt (in absolute mode) or 10% (in relative mode).
Left Arrow/Right Arrow: Adjusts the top width value on the panel (typically assigned to the end of the gradient). For each keypress, the value is changed by 1 pt (in absolute mode) or 10% (in relative mode).
C: Switches the width preview color (if enabled) between red and blue.
S: Switches the affected strokes (between all strokes, which is the default), and the focal stroke only. This is only makes a difference if the path has multiple strokes on it:

Width Gradient All Strokes vs. Focal Stroke
U: Temporarily disables Smart Guides, if they were enabled when the drag started.
W: Swaps the adjustment widths. For linear gradients, this is the same as reversing its direction.
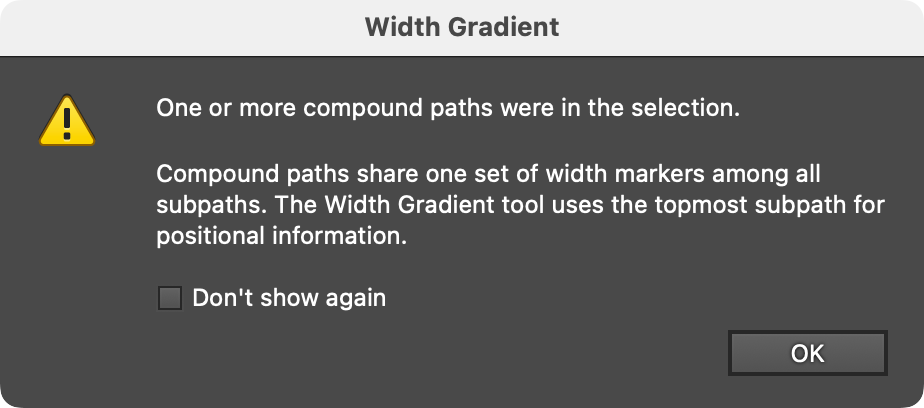
Although Width Gradient can be used on compound paths, because each subpath must share the same width profile, results may not be as expected. A warning dialog will be displayed in this situation:

Width Gradient Compound Path Warning
