- Getting Started
- Training
- Features
- Effects
-
Plugins
- AG Core
- AstuteBuddy
- Autosaviour
- ColliderScribe
- DirectPrefs
- DynamicSketch
- FindReplace
- InkFlow
- InkQuest
- InkScribe
- MirrorMe
- Phantasm
- Randomino
- Rasterino
- Reform
- Stipplism
- Stylism
-
SubScribe
- Getting Started
- Circle by Points Tool
- Tangent Circle Tool
- Curvature Circle Tool
- Arc by Points Tool
- Tangent Line Tool
- Perpendicular Line Tool
- Connect Tool
- Straighten Tool
- Lock Unlock Tool
- Orient Tool
- Quick Orient Tool
- Orient Transform Tool
- AG Layer Comps Panel
- Art Switcher Panel
- Gradiator Panel
- Gradient Forge Panel
- AG Color Select Tool
- Color Stamp
- Gradient From Art
- Pixels to Vector
- QuickOps
- Texturino
- VectorFirstAid
- VectorScribe
- WidthScribe
- FAQs
- Team Licensing
- Reseller Licensing
- Astute Manager
 Inflate Deflate Preferences
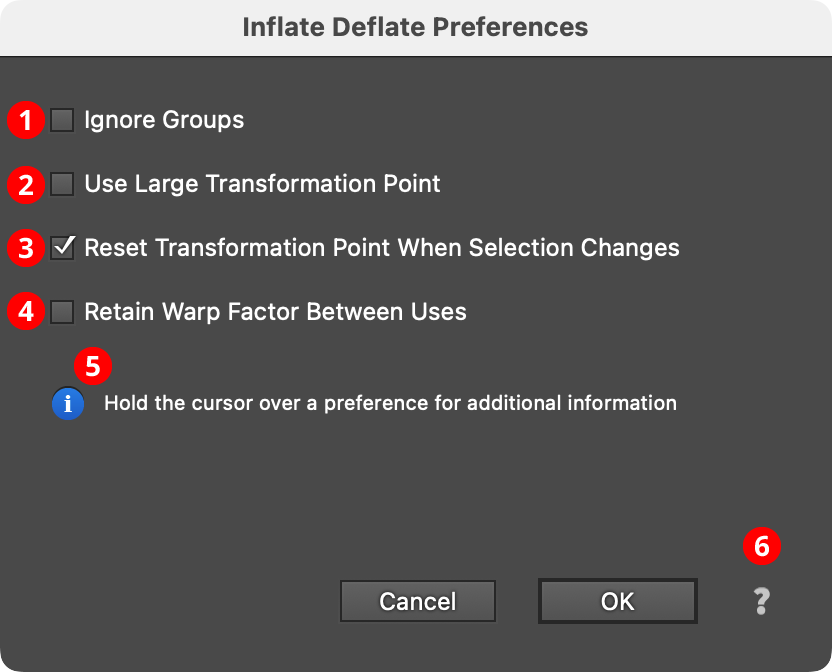
Doubleclicking the Inflate Deflate tool in the toolbox (or pressing the Enter key when the tool is selected) will bring up its preferences dialog.

Inflate Deflate Preferences Dialog
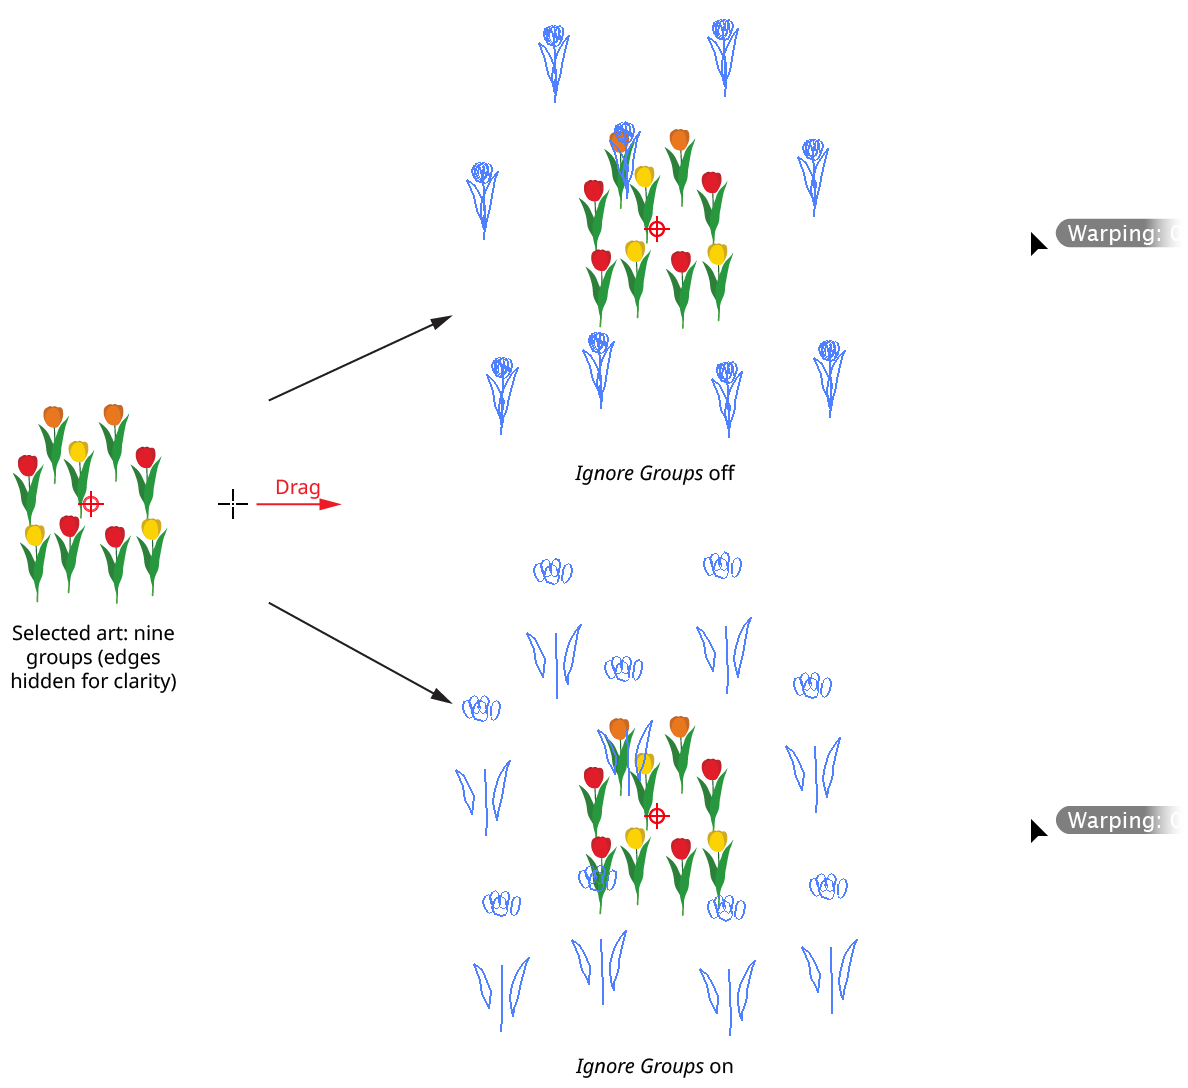
1. Ignore Groups
Normally, the Inflate Deflate tool moves grouped objects as one unit. But when this setting is enabled, all groups (including nested groups and clip groups) are ignored, and all child objects are moved independently. The setting can be toggled on the fly using the G key while dragging with the tool.

Inflate Deflate Ignore Grouping
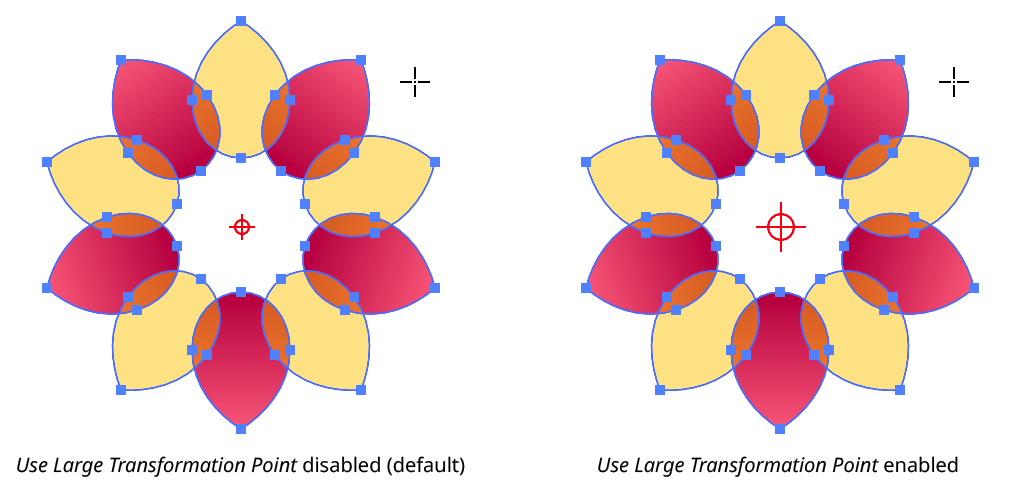
2. Use Large Transformation Point
When enabled, the size of the transformation point is increased.

Inflate Deflate Large Transformation Point
3. Reset Transformation Point When Selection Changes
When enabled (the default), selecting different artwork will cause the transformation point to be moved to the center of the newly-selected art’s bounding box, similar to the way the native Rotate tool works. If the setting is disabled, the transformation point can be reset manually by Shift-clicking on it.
4. Retain Warp Factor Between Uses
By default, the Inflate Deflate tool starts with the warp factor set to zero each time it is used. However, when this setting is enabled, the warp factor is not reset between uses.
5. Informational area
Shows a brief description of each preference control when the cursor is being hovered over it.
6. Help Button
Opens the help documentation in the Astute Manager. If this does not automatically appear, please ensure your Astute Manager is running first.
