- Getting Started
- Training
- Features
- Effects
-
Plugins
- AG Core
- AstuteBuddy
- Autosaviour
- ColliderScribe
- DirectPrefs
- DynamicSketch
- FindReplace
- InkFlow
- InkQuest
- InkScribe
- MirrorMe
- Phantasm
- Randomino
- Rasterino
- Reform
- Stipplism
- Stylism
-
SubScribe
- Getting Started
- Circle by Points Tool
- Tangent Circle Tool
- Curvature Circle Tool
- Arc by Points Tool
- Tangent Line Tool
- Perpendicular Line Tool
- Connect Tool
- Straighten Tool
- Lock Unlock Tool
- Orient Tool
- Quick Orient Tool
- Orient Transform Tool
- AG Layer Comps Panel
- Art Switcher Panel
- Gradiator Panel
- Gradient Forge Panel
- AG Color Select Tool
- Color Stamp
- Gradient From Art
- Pixels to Vector
- QuickOps
- Texturino
- VectorFirstAid
- VectorScribe
- WidthScribe
- FAQs
- Team Licensing
- Reseller Licensing
- Astute Manager
 Selection and Origin Point Specification
3. Selection Specification
Specifies which gradients to operate on: those on the fills of the selected paths, those on the strokes, or both. Clicking on the Fill or Stroke area toggles its selection state. Previews of the gradient present in each area are shown; if multiple, different gradients are selected, the corresponding area will show “Mixed gradients”.
4. Origin Point Specification
Lets you specify the origin point of the selected gradients either by entering the coordinates numerically, or, after clicking the icon on the right side, by using a tool to click on the artboard to specify the position.
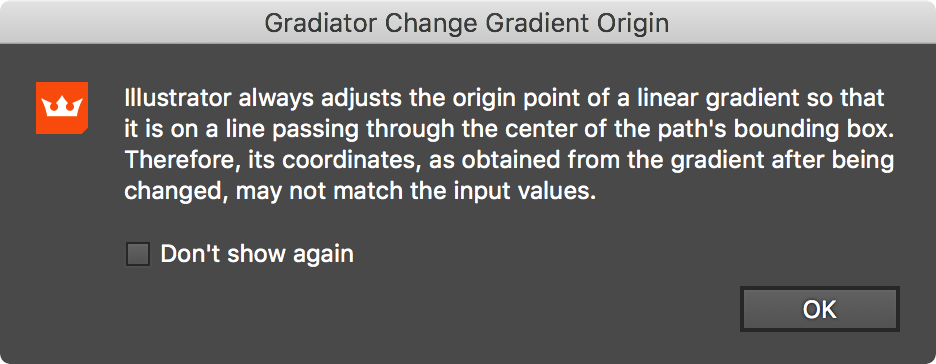
The first time you change the origin point of a linear gradient, Gradiator will display a message reminding you that a linear gradient’s origin is always adjusted by Illustrator so it lies on a line passing through the center of the path’s bounding box (this behavior is also apparent when using the native Gradient tool). You can suppress this message from coming up again by clicking the Don’t show again checkbox. To restore this and other messages and warnings, see Gradiator Panel: Flyout Menu.

Gradiator Panel Warning Dialog
To center the gradient’s origin, Shift-click the crosshair icon on the left. To set a gradient’s center rather than its origin when clicking with the origin setter tool, hold down Shift before clicking. After clicking, the tool will switch back to the previously-selected tool.
