
 Gap Preferences
Doubleclicking the Gap tool in the toolbox (or pressing the Enter key when the tool is selected) will bring up its preferences dialog.
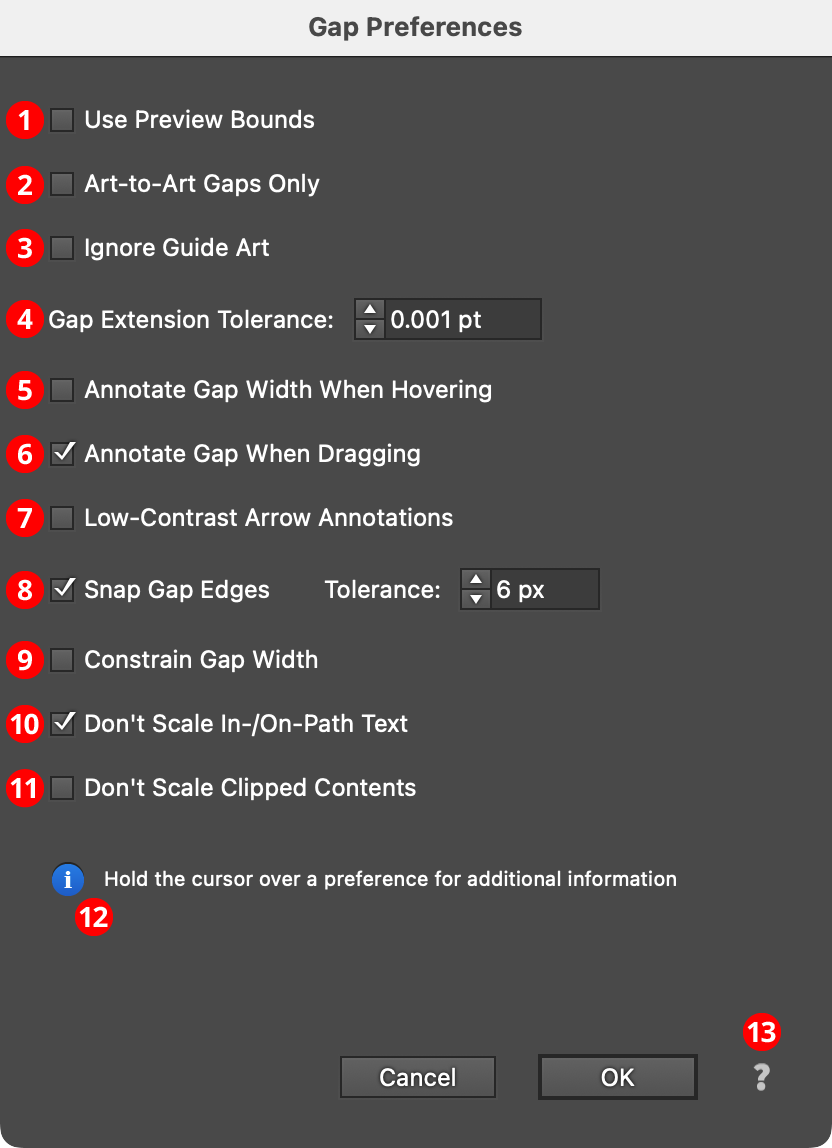
Gap Preferences Dialog
1. Use Preview Bounds
Overrides the general preference of the same name. When enabled, the strokes and live effects of the artwork are included when calculating its bounding box, which affects where the gaps are positioned.
2. Art-to-Art Gaps Only
When enabled, the Gap tool will ignore all gaps between art and the edges of the artboard.
3. Ignore Guide Art
When enabled, the Gap tool will ignore all guide art (both ruler guides and art turned into guides), even when unlocked.
4. Gap Extension Tolerance
Specifies how close the edges of adjacent art objects must be to the gap edges to be considered part of an extended gap comprised of multiple pairs of objects (or the artboard edge and multiple objects). The default value is 0.001 pt, but it can be increased to as high as 12 pt. When an extended gap includes objects which are within tolerance but are misaligned by more than 0.001 pt, the gap will be drawn in pink instead of gray.
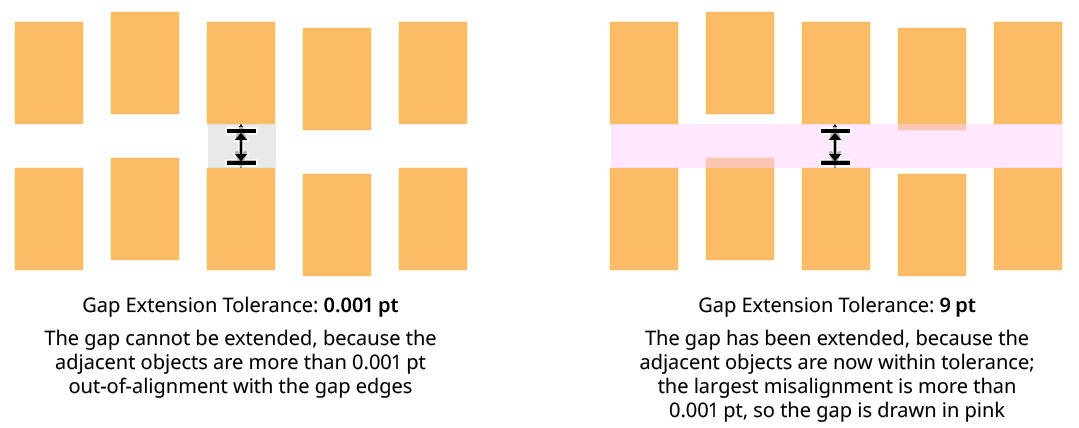
Gap Extension Tolerance
When dragging an extended gap with misaligned objects, the F key may be pressed to force alignment of all the objects. Pressing F a second time will restore the misalignment.
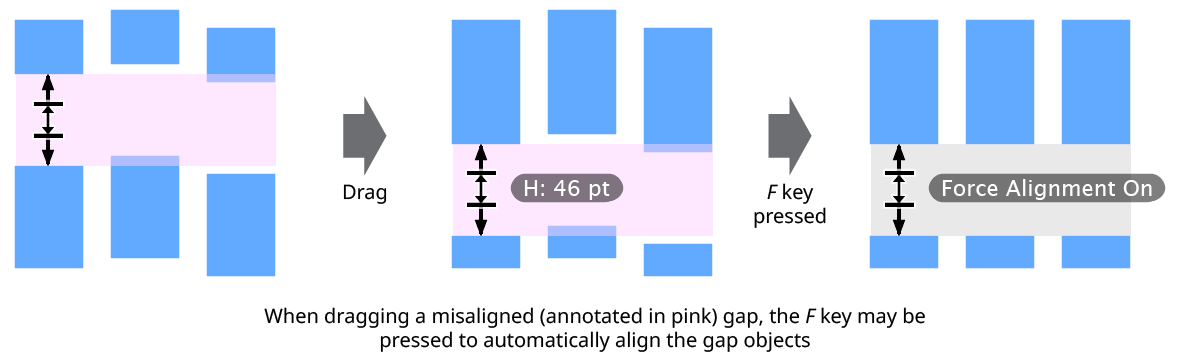
Gap Aligning Objects
5. Annotate Gap Width When Hovering
When enabled, the size of the gap is shown when hovering over a gap with the cursor (and not just when dragging the gap). The preference is off by default (to resemble the InDesign tool).
6. Annotate Gap When Dragging
If Annotate Gap When Dragging is turned off, the gray rectangle and black arrow annotations will not be drawn when the tool is being dragged. The preference may be toggled on the fly by pressing the A key.
7. Low-Contrast Arrow Annotations
When enabled, the arrows that are drawn over the annotated gap rectangles are rendered with lower opacity. The preference is off by default (to resemble the InDesign tool).

Gap Arrow Annotations
8. Snap Gap Edges
By default, when dragging a gap to move or resize it, its edges are snapped to the edges of the bounding boxes of other objects on the same artboard, with a default snapping tolerance of 6 screen pixels. When a gap edge is being snapped, a red guide is drawn at the snapped location. Snapping may be turned on or off while dragging a gap by pressing the S key.
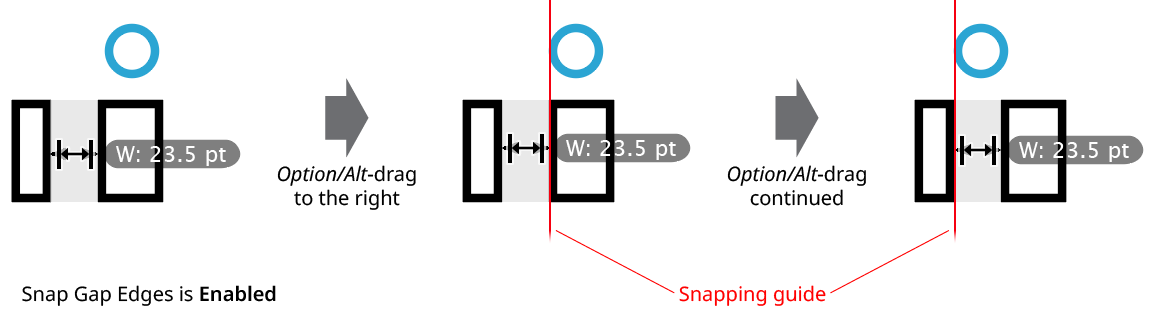
Gap Snapping
9. Constrain Gap Width
If enabled, then when resizing a gap by dragging it, its width will be constrained to integer multiples of the native keyboard increment value. For example, if the keyboard increment is set to 20 pt, then the gap width could only be resized to 0 pt, 20 pt, 40 pt, 60 pt, and so on. This constraint takes precedence over snapping. Constraining does not affect gap location when moving a gap without resizing it. Constraining may be turned on or off while dragging a gap by pressing the C key.
10. Don’t Scale In-/On-Path Text
By default, the Gap tool acts like InDesign’s Gap tool and scales the paths of In-Path and On-Path text objects, but not the text itself. However, by turning off this preference, it can be made to scale the text as well (treating these objects as if they were point text). The preference can be turned on or off while dragging a gap by pressing the T key.
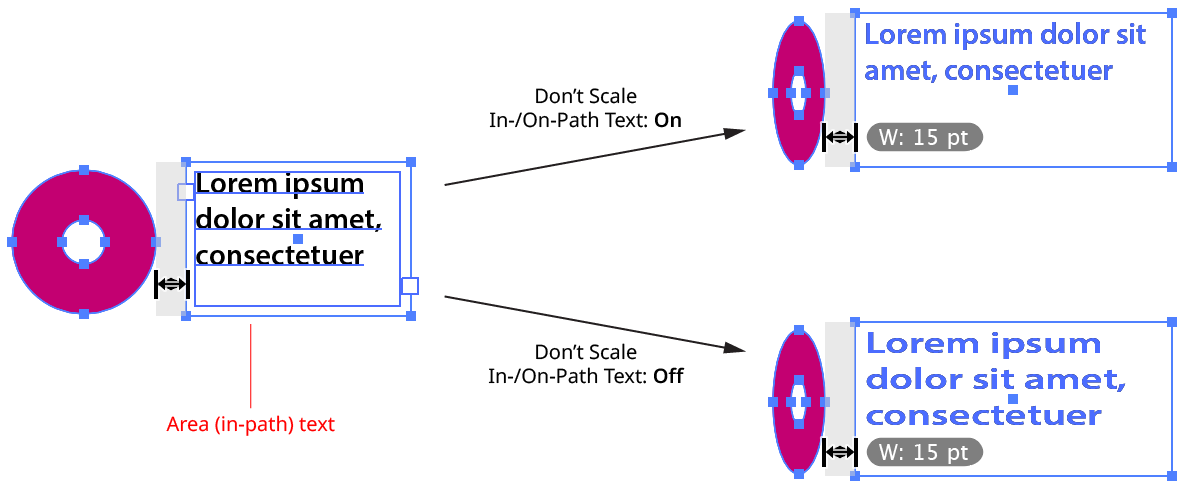
Gap Scaling Text
11. Don’t Scale Clipped Contents
By default, the Gap tool treats a clip group like any other group and scales it as a whole. However, by turning Don’t Scale Clipped Contents on, only the clipping path of a clip group is scaled, not its contents. This might be useful, for example, when adjusting gaps between clipped images. Note that clipped content may need to be adjusted afterwards, depending on the scale factor. The preference can be turned on or off while dragging a gap by pressing the M key.
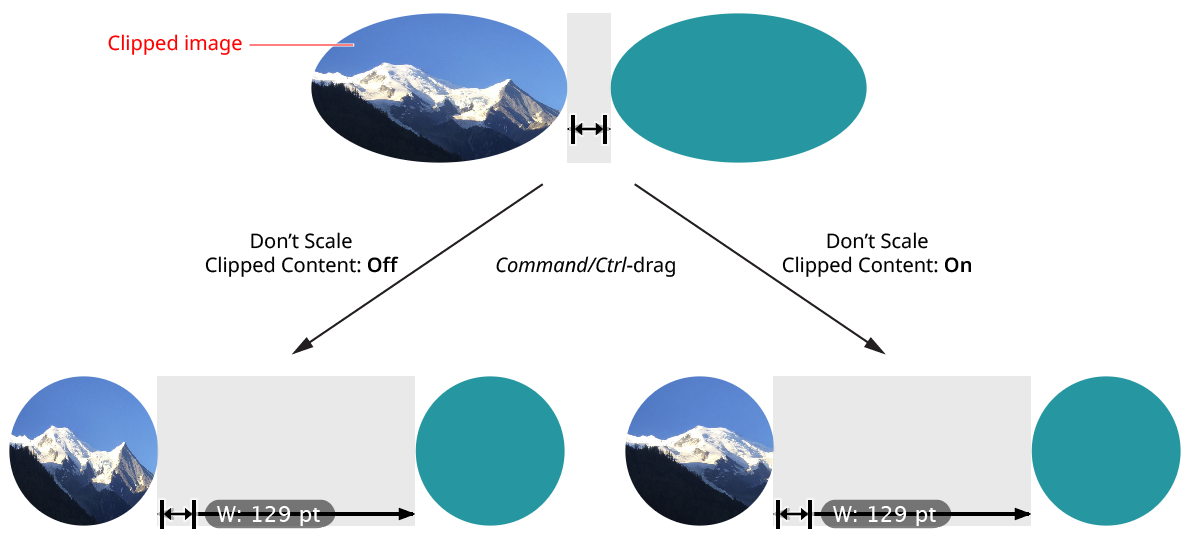
Gap Scaling Clipped Content
10. Informational area
Shows a brief description of each preference control when the cursor is being hovered over it.
11. Help Button
Opens the help documentation in the Astute Manager. If this does not automatically appear, please ensure your Astute Manager is running first.